🌿 Premium Nursery Plants 🚚 Free Delivery Above ₹499 🍃 Sustainably Grown & Carefully Nurtured ✨ Elevate Your Living Spaces Naturally

Author: VaanMitra

  • Camellia Japonica vs. Sasanqua: Which Is Right for Your Garden?

    Camellia Japonica vs. Sasanqua: Which Is Right for Your Garden?

    When planning a vibrant, evergreen landscape that defies the drab colors of the colder months, few shrubs can compete with the majestic camellia. However, as soon as you visit a nursery, you will quickly encounter a major decision: Camellia Japonica vs. Sasanqua.

    Understanding the fundamental differences in the Camellia Japonica vs. Sasanqua matchup is essential for gardening success. While they look similar at first glance, these two popular species have distinctly different bloom times, sun tolerances, and growth habits.

    Below, we break down the great debate of Camellia Japonica vs. Sasanqua so you can choose the perfect evergreen shrub for your specific landscape.

    The Quick Comparison: At a Glance

    Before we dive into the specific profiles of each plant, use this interactive chart to see exactly how the Camellia Japonica vs. Sasanqua comparison stacks up across key growing metrics.

    1. Camellia Sasanqua (The Autumn Bloomer)

    In the Camellia Japonica vs. Sasanqua debate, the Sasanqua is the undisputed early bird. If you want a plant that bridges the gap between the last blooms of summer and the dead of winter, this is your answer. They burst into color from early autumn through early winter.

    • The Blooms: Sasanqua flowers are generally smaller and often have a more delicate, single petal structure. They tend to drop their petals individually, creating a beautiful “snow” of color on the ground.
    • Sun Tolerance: A major factor in the Camellia Japonica vs. Sasanqua decision is sunlight. Sasanquas can handle significant amounts of direct afternoon sun once established.
    • Growth Habit: They grow faster than Japonicas and feature smaller, finer foliage. Their pliable branches make Sasanquas phenomenal espaliers or dense privacy hedges.

    2. Camellia Japonica (The Winter Queen)

    When looking at Camellia Japonica vs. Sasanqua, the Japonica is the classic show-stopper. This species takes the baton from the Sasanqua, blooming from mid-winter straight through early spring.

    • The Blooms: Japonica flowers are massive and come in complex forms, including peony, anemone, and formal double. When a Japonica flower dies, the entire bloom usually falls off the bush in one heavy piece.
    • Sun Tolerance: This is the strictest rule of the Camellia Japonica vs. Sasanqua comparison: Japonicas must have shade. Planting a Japonica in full, direct sun will result in scorched, yellowing leaves.
    • Growth Habit: They are slower-growing with larger, deeply glossy, leathery leaves. They form a dense, pyramidal shape that makes them perfect standalone specimen plants.

    4 Key Differences to Consider When Buying

    When weighing the Camellia Japonica vs. Sasanqua options for your yard, ask yourself these four questions:

    1. When do you want flowers?
      • Choose Sasanqua: For Fall/Early Winter color.
      • Choose Japonica: For Mid-Winter/Spring color.
    2. How much sun does the spot get?
      • Choose Sasanqua: If the spot gets 4+ hours of direct afternoon sun.
      • Choose Japonica: If the spot is heavily shaded or only gets gentle morning sun.
    3. What is your design goal?
      • Choose Sasanqua: For a fast-growing hedge or an espalier against a trellis.
      • Choose Japonica: For a highly structured focal point in a shaded woodland garden.
    4. Do you hate raking petals?
      • Choose Sasanqua: If you love the romantic look of shattered petals carpeting the mulch.
      • Choose Japonica: If you prefer to pick up whole, intact blooms.

    Planting and Care Essentials for Both Varieties

    Regardless of who wins the Camellia Japonica vs. Sasanqua battle in your landscape design, both species share the exact same fundamental soil and watering requirements. Both sides of the Camellia Japonica vs. Sasanqua spectrum need the following to thrive:

    • Acidic Soil is Non-Negotiable: Camellias are acid-lovers. They require a soil pH between 5.5 and 6.5.
    • Plant High: Camellias have shallow root systems. When placing them in the ground, ensure the top of the root ball is slightly above the surrounding soil level.
    • Mulch Heavily: Apply a 2-to-3-inch layer of pine straw or pine bark mulch over the root zone to keep the shallow roots cool.

    Pro Tip for Year-Round Color: You don’t actually have to pick a single winner in the Camellia Japonica vs. Sasanqua matchup! Plant both varieties in their respective preferred lighting zones to enjoy continuous, uninterrupted blooms from October all the way through April.

    Buy our Camellia plant here: https://vaanmitra.in/product-category/buy-flowering-plants-online-india/buy-camellia-plant-online/

    Know more about Camelliahere: https://en.wikipedia.org/wiki/Camellia

  • How to Repot an Orchid: Bark vs. Sphagnum Moss & Step-by-Step Guide

    How to Repot an Orchid: Bark vs. Sphagnum Moss & Step-by-Step Guide

    Even the most beautiful houseplants eventually outgrow their environment, and knowing how to repot an orchid is vital for their long-term survival. In the wild, epiphytic orchids cling to tree branches with their roots exposed to endless fresh air and rain. Inside our homes, we confine those wild roots into plastic pots. Over time, that potting media breaks down, compacts, and suffocates the root system.

    If you want to keep your plant blooming year after year, learning how to repot an orchid correctly is the single most important skill you can master.

    Before you unpot your plant to figure out how to repot an orchid, you must make a critical decision: what are you going to plant it in? Below, we break down the great debate between pine bark and sphagnum moss, followed by a complete step-by-step guide.

    Bark vs. Sphagnum Moss: Which is Better?

    Standard potting soil will kill an orchid in a matter of weeks by suffocating the roots. To understand how to repot an orchid, you must first understand its need for highly aerated media. The two most common choices are Orchid Bark (usually fir or pine) and Sphagnum Moss.

    There is no objectively “perfect” medium—your choice depends entirely on your home’s humidity, your watering habits, and the type of orchid you are growing.

    1. Pine or Fir Bark (The Safe Choice)

    Bark nuggets replicate the natural surface of a tree. They provide massive air pockets, ensuring orchid roots never sit in stagnant water. If you are learning how to repot an orchid for the very first time, bark is usually the safest starting point.

    • Best For: Chronic over-waterers, humid environments, and thick-rooted orchids like Phalaenopsis (Moth Orchids) and Cattleya.
    • The Catch: Bark dries out quickly. In a dry, air-conditioned home, you may need to water your orchid every 5 to 7 days. Fresh bark also repels water initially, requiring a 24-hour pre-soak before repotting.

    2. Sphagnum Moss (The Moisture Manager)

    Premium long-fibered sphagnum moss acts like a sponge, absorbing up to 20 times its weight in water and releasing it slowly to the roots over weeks. If you live in an arid climate, discovering how to repot an orchid using moss can save you from constantly watering dry plants.

    • Best For: Chronic under-waterers, dry climates, and fine-rooted orchids like Oncidium or Paphiopedilum.
    • The Catch: It is incredibly easy to overwater moss. If packed too tightly, it suffocates the roots and triggers instant root rot. It also decays much faster than bark, requiring repotting every 12 months rather than every 2-3 years.

    When is the Right Time to Learn How to Repot an Orchid?

    You should never repot an orchid while it is actively blooming unless it is a life-or-death emergency (like severe root rot). The shock of repotting will cause the plant to drop its flowers prematurely.

    Plan to repot when you see these three signs:

    1. The last flower has faded and fallen off the spike.
    2. The roots are pushing heavily out of the top of the pot or circling aggressively around the bottom drainage holes.
    3. The potting media smells sour, looks crumbly like dirt, or stays soggy for days.

    Step-by-Step Guide: How to Repot an Orchid

    Gather your supplies before starting: your chosen potting media (pre-soaked if using bark), a clean pair of pruning shears, a new clear plastic orchid pot, and 3% hydrogen peroxide. Follow these steps to master exactly how to repot an orchid safely:

    1.Unpot and Untangle: Be gentle with healthy roots.

    Squeeze the sides of the old plastic pot gently to loosen the media. Slide the orchid out by holding it near the base of the leaves. Using your fingers, carefully pick away all the old bark or moss tangled inside the root system.

    2.Prune the Dead Roots: Sterilize shears first to prevent disease.

    Inspect the naked root system. Healthy roots will be plump and either silvery-gray, pale yellow, or bright green. Dead roots will be papery, hollow, flat, brown, or mushy and slimy. Snip off all dead, hollow, or mushy roots flush with the base of the plant.

    3.Disinfect the Root Zone:

    Give the remaining healthy roots a quick spray with 3% hydrogen peroxide. This kills lingering fungal spores, bacteria, or pests hiding in the root crevices. Let it sit for 2 to 3 minutes until it stops bubbling.

    4.Position the Orchid in the New Pot:Use clear slotted pots for airflow.

    Hold the orchid suspended inside the new clear plastic pot so that the base of the bottom leaves (the crown) sits exactly level with the upper rim of the pot. Do not bury the leaves, or the crown will rot.

    5.Fill with Media:

    Begin dropping your fresh bark, moss, or hybrid mix in and around the roots. Tap the side of the pot continuously as you fill to help the chunks settle into the air gaps. Do not press or crush the media down aggressively.

    6.Water and Rest:

    Once the plant is secure, run tepid water through the pot for two minutes to wash away bark dust and hydrate the new roots. Place the orchid in a shady, indirect light spot for a week to recover from the repotting shock. Once you see new growth, you have officially learned how to repot an orchid successfully.

    Buy our Orchids plant here: https://vaanmitra.in/product-category/buy-flowering-plants-online-india/orchids/

    Know more about Orchid here: https://en.wikipedia.org/wiki/Orchid

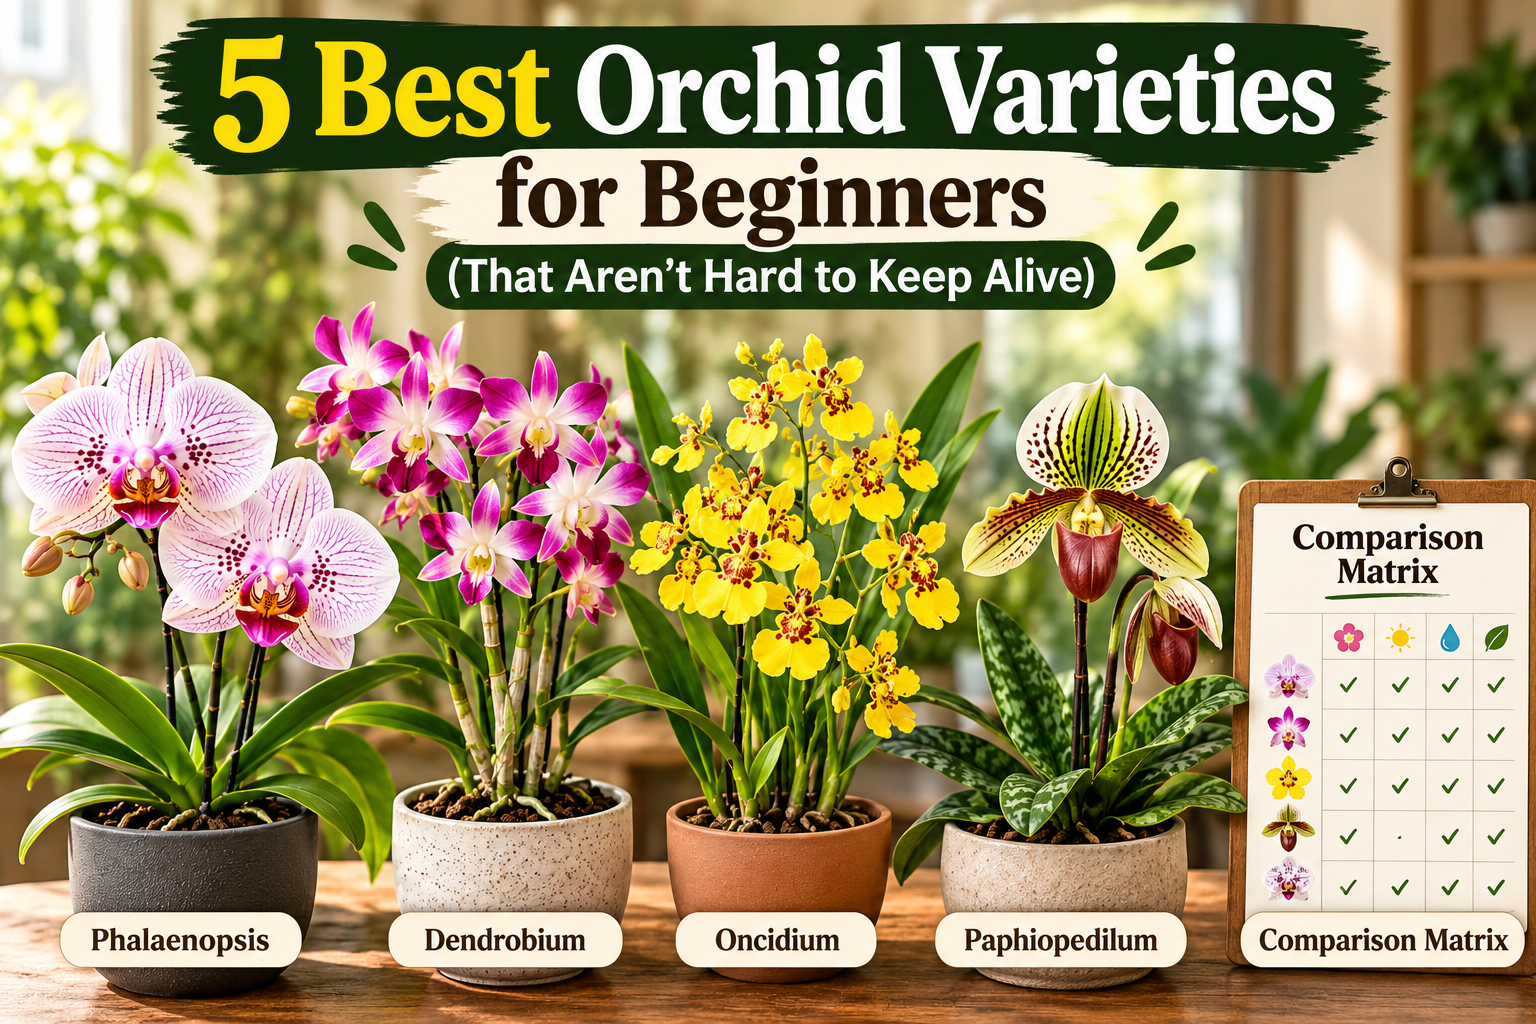
  • 5 Best Orchid Varieties for Beginners (That Aren’t Hard to Keep Alive)

    5 Best Orchid Varieties for Beginners (That Aren’t Hard to Keep Alive)

    Best Orchids have a notorious, mostly unfair reputation for being finicky divas that demand greenhouse conditions and drop their flowers at the slightest breeze. In reality, the orchid family is one of the largest plant families on earth, meaning there is an orchid perfectly suited for almost every indoor environment.

    If you are new to growing orchids, the secret to success is simply starting with the right plant. Choosing a resilient, beginner-friendly variety instantly sets you up for long-lasting blooms and stress-free care.

    Whether you have a dim, north-facing window or a bright, sun-drenched living room, here are the 5 best orchid varieties for beginners that are surprisingly hard to kill.

    Quick Comparison: Find Your Perfect Match

    Before diving into the specifics, use this quick cheat sheet to match your home’s environment and your watering habits with the ideal orchid variety:

    Best Orchids VarietyLight RequirementWatering FrequencyBest For…
    PhalaenopsisLow to Medium (Indirect)Once a weekTotal beginners; low-light homes
    PaphiopedilumLow to Medium (Indirect)Keep evenly moistChronic over-waterers
    DendrobiumBright, filtered lightLet dry between wateringsBright windowsills
    OncidiumBright, indirect lightOnce to twice a weekImpatient growers (masses of blooms)
    CattleyaVery Bright (Some direct morning sun)Let dry out completelyChronic under-waterers; fragrance lovers

    1. Phalaenopsis (The Moth Orchid)

    The undisputed champion for beginners.

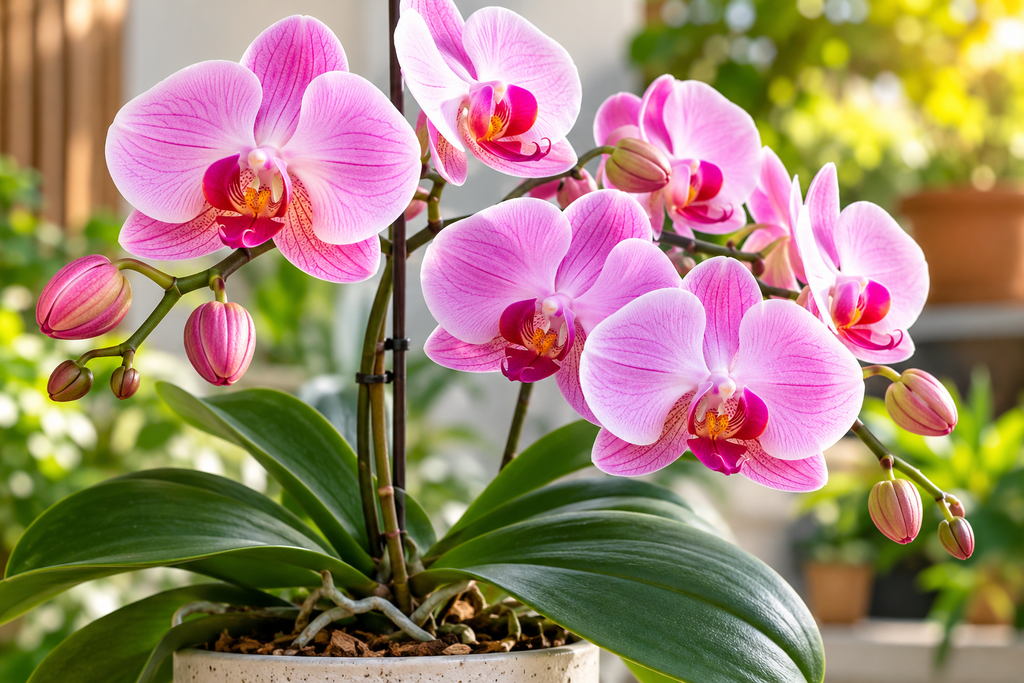
    If you have ever seen an orchid in a grocery store or a home improvement center, it was almost certainly a Phalaenopsis. Often called “Moth Orchids” because their broad, flat petals resemble moths in flight, these are the gateway plants for every best orchid enthusiast.

    • Why it’s beginner-friendly: They tolerate standard household temperatures seamlessly. They are highly forgiving of low light and only need watering when their chunky bark mix dries out (typically once a week).
    • The Bloom: A single flower spike can hold a dozen blooms that last anywhere from 2 to 4 months.
    • Care Secret: Never let water pool in the center where the leaves meet (the crown). Always water the potting media directly.

    2. Paphiopedilum (The Slipper Orchid)

    The best orchids for the “over-waterer”.

    Most orchids die because eager beginners water them too often, suffocating the roots. Paphiopedilums are terrestrial (ground-dwelling) orchids, meaning they actually prefer their roots to stay consistently damp (but not soggy).

    • Why it’s beginner-friendly: They thrive in the same low-light conditions as African Violets and Phalaenopsis, making them perfect for dim apartments. Furthermore, many varieties feature gorgeous, mottled, snakeskin-like foliage, making them beautiful houseplants even when they aren’t blooming.
    • The Bloom: They produce a highly distinctive, pouch-shaped flower (resembling a lady’s slipper) that can last up to two months.
    • Care Secret: Repot them every year. Because they require consistent moisture, their potting media breaks down much faster than the media of orchids that like to dry out.

    3. Dendrobium

    The tough, adaptable survivor.

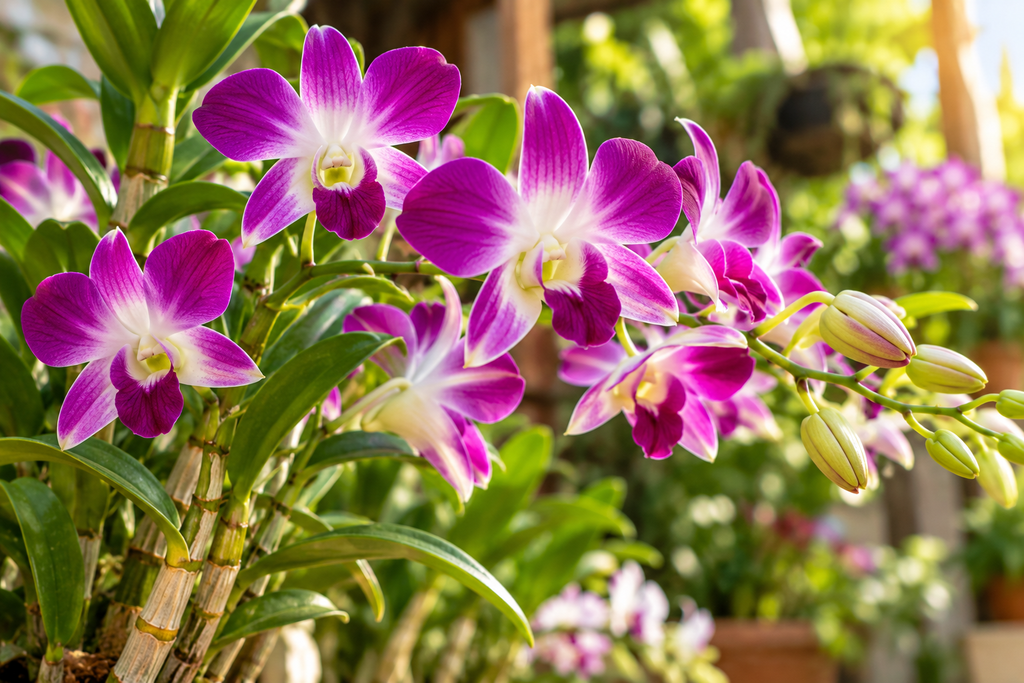
    Dendrobiums are a massive genus of best orchids with over 1,000 species, but the Dendrobium phalaenopsis and Dendrobium nobile types are famously easy to grow. They grow tall, thick, cane-like stems designed to store water and nutrients, making them incredibly drought-resistant.

    • Why it’s beginner-friendly: They can handle a missed watering or two without dropping their buds. They are vigorous growers that quickly adapt to standard home environments.
    • The Bloom: They produce vibrant clusters of flowers that sprout directly from the sides of their tall canes, creating a spectacular vertical display.
    • Care Secret: Dendrobiums require significantly brighter light than Moth Orchids to trigger blooming. Place them near an east- or south-facing window with a sheer curtain.

    4. Oncidium (The Dancing Lady Orchid)

    The best orchid for massive floral displays.

    If you want an orchid that looks like a fireworks display, Oncidiums are your best Orchid. Nicknamed the “Dancing Lady” because their ruffled lower lips look like a swirling skirt, these orchids produce dozens—sometimes hundreds—of small, delicate flowers on a single branching spike.

    • Why it’s beginner-friendly: They are remarkably expressive. Their pseudo-bulbs (the thick, green, egg-shaped bases at the bottom of the leaves) will begin to wrinkle if the plant is thirsty, telling you exactly when it’s time to water.
    • The Bloom: Explosive sprays of yellow, rust, pink, or chocolate-colored flowers. Many Oncidium hybrids, like the famous ‘Sharry Baby’, are highly fragrant and smell exactly like vanilla chocolate.
    • Care Secret: They require good air circulation to thrive. Keep them in a room with a ceiling fan or near a gentle draft to prevent fungal spotting on their thin leaves.

    5. Cattleya (The Corsage Orchid)

    The fragrant, sun-loving classic.

    Historically used in corsages during the 1950s, Cattleyas are the classic, ruffled, “Queen of best Orchids”. While they look impossibly exotic and delicate, they are actually incredibly tough epiphytes that thrive on benign neglect.

    • Why it’s beginner-friendly: Cattleyas have thick, leathery leaves and large water-storing pseudobulbs. They are the perfect plant for the “forgetful waterer” because they explicitly want their potting media to dry out completely between soakings.
    • The Bloom: Massive, ruffled, brightly colored flowers that usually carry a heavy, intoxicating citrus or floral fragrance.
    • Care Secret: Cattleyas are high-light orchids. They need lots of bright, filtered sunlight to rebloom. If the leaves are dark, forest green, they aren’t getting enough light; healthy Cattleya leaves should be a light, grassy, olive green.

    3 Pro-Tips for Keeping Any Beginner Orchid Alive

    1. Ditch the Ice Cubes: Never water your tropical orchids with ice cubes. Freezing water shocks the root system and damages cell walls. Instead, soak the pot in room-temperature water for 10 minutes, then let it drain completely.
    2. Inspect the Roots: Healthy best orchid roots are plump and firm. If they are silvery-gray, the orchid is thirsty. If they are bright green, wait to water. If they are brown and mushy, the plant is rotting from overwatering.
    3. Repot After Buying: Many store-bought orchids are packed tightly in dense moss to survive shipping. Once the flowers drop, repot your new plant into a chunky, aerated bark mix so the roots can breathe.

    Buy our Orchids plant here: https://vaanmitra.in/product-category/buy-flowering-plants-online-india/orchids/

    Know more about Orchid here: https://en.wikipedia.org/wiki/Orchid

  • How to Make an Orchid Rebloom: The Step-by-Step Pruning & Feeding Guide

    How to Make an Orchid Rebloom: The Step-by-Step Pruning & Feeding Guide

    When that final exotic bloom drops from your orchid spike, it is easy to assume the plant’s life cycle is over. In reality, the end of a flowering cycle is simply the entry point into a natural resting phase and know how to make an orchid rebloom.

    Getting a grocery-store moth orchid (Phalaenopsis) to trigger brand-new flower spikes does not require greenhouse equipment. It comes down to two variables: knowing where to cut the spent spike and timing light, temperature, and feeding cycles correctly.

    Below is a complete, step-by-step master guide how to make an orchid rebloom spikes season after season.

    The Rebloom Timeline: What to Expect

    PhaseDurationPlant ActivityPrimary Care Focus
    Post-Bloom RestWeeks 1–4Flower drops; energy shifts inwardPrune spike; assess root & medium health
    Vegetative GrowthMonths 2–5New roots expand; fresh center leaf emergesHigh indirect light; regular balanced feeding
    Spike InductionWeeks 6–910°F night temperature drop triggers dormant nodeCool nights; switch to bloom-booster ratio
    Bud DevelopmentWeeks 10–14Flower spike elongates; buds swellStake spike; stable temperatures; maintain humidity
    Bloom PhaseWeeks 15–26+First flower opens; full display holds for monthsStop heavy fertilizing; water consistently

    Step 1: Pruning Your Spent Orchid Spike (The 3 Scenarios)

    Before grabbing pruning shears, sterilize the blades with rubbing alcohol or a butane flame to prevent viral and bacterial transmission. Examine the condition of the flower stem and know how to make an orchid rebloom.

           [Spent Flower Tip]
                  |
                  x  <-- Cut 1/2" above top green node (Fast Rebloom)
            [Node 3] (Small bump / triangle bracket)
                  |
            [Node 2]
                  |
                  |
                  x  <-- Cut 1" from plant base (Dead/Brown Spike or Recovery)
            [Node 1]
        =================== [Crown & Potting Mix]
    

    Scenario A: The Spike Is Still Green and Firm

    If the stem remains fleshy and green after blooms drop, it still contains active dormant nodes that can produce secondary side shoots and know how to make an orchid rebloom.

    • Where to Cut: Locate the highest node (the small triangular notch or brown bump along the stem) that sat below the lowest fallen bloom. Make a clean, 45-degree angled cut 0.5 inches (1.2 cm) above that node.
    • Result: A secondary spike often emerges from that node within 8 to 12 weeks. Blooms will be slightly smaller, but flowers appear faster.

    Scenario B: The Spike Has Turned Yellow, Brown, or Woody

    Once a flower spike turns brown, it is completely desiccated. It cannot produce flowers and only drains residual moisture and know how to make an orchid rebloom..

    • Where to Cut: Trace the dead spike down to the base where it emerges from the foliage. Slice it cleanly away 1 inch (2.5 cm) above the base.
    • Result: The orchid redirects 100% of its resources into building root mass and a new central leaf before generating a brand-new basal spike.

    Scenario C: The Plant Has Fewer Than 4 Leaves

    If your orchid only has 2 or 3 small, limp leaves, it lacks the carbohydrate reserves to sustain another bloom cycle safely and know how to make an orchid rebloom.

    • Where to Cut: Cut the spike straight down to the base—even if it is green. Forcing a weak orchid to rebloom prematurely can exhaust and kill the crown.

    Pro Tip: Seal any fresh cut on an orchid stem with a light dusting of ordinary ground cinnamon. Cinnamon acts as a natural fungicide and dessicant, preventing pathogens from entering the open wound and know how to make an orchid rebloom.

    Step 2: The “Weakly, Weekly” Feeding Schedule

    Orchids are light feeders. In the wild, they consume trace minerals washed down tree bark by tropical rains. Dumping full-strength all-purpose fertilizer onto orchid roots burns sensitive root tips and aborts new spikes and know how to make an orchid rebloom.

    The Formula: 20-20-20 Urea-Free Fertilizer

    Always verify that your orchid fertilizer is urea-free. Standard plant foods use urea nitrogen, which requires soil microbes to break down before roots can absorb it. Because orchids grow in bark or moss rather than garden soil, urea simply causes chemical root burn and know how to make an orchid rebloom.

    • Dilution Rate: Mix balanced water-soluble orchid fertilizer at 1/4 of the manufacturer’s recommended label dose (roughly 1/4 teaspoon per gallon of water).
    • The Routine:
      • Weeks 1, 2, and 3: Water thoroughly with the 1/4-strength fertilizer solution.
      • Week 4 (Flush Week): Flush the pot thoroughly with plain, tepid tap or distilled water. This washes away accumulated mineral salts that crust on the bark and dry out aerial roots.

    Vegetative Phase vs. Spike-Triggering Phase

    • Spring to Late Summer: Use a balanced 20-20-20 or high-nitrogen formula to push root tips and new leaf development.
    • Early Autumn: Switch to a high-phosphorus “bloom booster” formula (such as 10-30-20) for 3 to 4 weeks to prime floral bud production inside the nodes.

    Step 3: Triggering the Spike (The Temperature Secret)

    This is where 90% of home growers get stuck: an orchid can produce gorgeous green leaves year after year, yet refuse to flower and know how to make an orchid rebloom..

    Orchids require an environmental cue to break dormancy. In their native habitats, autumn brings a noticeable drop in overnight temperatures, signaling the plant to send up floral shoots ahead of pollinator season and know how to make an orchid rebloom.

    How to Replicate It at Home:

    1. Wait for Late Autumn / Early Winter: Ensure the plant has grown at least one new leaf that is as large as or larger than the previous leaf.
    2. Induce a 10°F to 15°F Nighttime Drop: For 2 to 4 consecutive weeks, expose your orchid to cooler overnight temperatures of 55°F to 65°F (13°C to 18°C), while maintaining daytime room temperatures between 70°F and 78°F (21°C to 26°C).
    3. Best Locations: Place the plant on a cool windowsill (away from freezing window contact), inside an unheated guest bedroom, or crack a window slightly at night during early fall.

    Within 3 to 5 weeks of consistent cool nights, you will notice a tiny, rounded green nub protruding from the base between the leaf joints.

    Is It a Root or a Flower Spike?

    Beginner growers often confuse fresh aerial roots with new flower spikes and know how to make an orchid rebloom:

            ROOT TIP                         FLOWER SPIKE
            (Rounded, smooth)                ("Mitten" or chisel-shaped tip)
    
               .-.                                .--.
              (   )                              /    \ 
               | |                              |  /\  |  <-- Asymmetrical
               | |                              |  \/  |      tip / notch
               | |                               \    /
          Bright Green / Silver                   |  |
    
    • Aerial Root: Completely circular and rounded like a smooth pencil eraser. The tip is often bright, glossy green or tipped with red-purple, fading to silvery-gray behind the tip. It usually points downward or sideways.
    • Flower Spike: Flat, asymmetrical, and shaped distinctly like a tiny lobster claw, mitten, or chisel tip. It has tiny scale-like segmentation ridges along the stem and grows strictly upward toward the light source.

    Step 4: Staking and Training the Developing Spike

    Once the flower spike reaches 4 to 6 inches (10–15 cm) in height, it becomes flexible enough to train without snapping and know how to make an orchid rebloom.

    1. Insert a Stake: Slide a thin bamboo or fiberglass stake into the potting media, placing it close to the spike base while avoiding root damage.
    2. Attach Clips: Secure the spike to the stake using small plastic orchid clips or twist ties. Fasten the clip 1 to 2 inches below the growing tip.
    3. Do Not Rotate the Plant: Keep the orchid facing the exact same direction relative to your window. Flower spikes naturally grow toward light. If you turn the pot repeatedly, the spike will twist and distort into an irregular corkscrew shape.
    4. Stop Staking at Bud Formation: Once the flower buds begin swelling at the tip, stop attaching clips. Allow the terminal end of the spike to arch outward into a graceful floral cascade.

    Quick-Reference Checklist: Rebloom Essentials

    Know how to make an orchid rebloom.

    • Light: Bright, indirect sun (leaves should be olive or bright lime-green; dark forest green indicates too little light to bloom).
    • Pruning: Cut above the highest green node for secondary blooms; cut to base if brown or plant is small.
    • Feeding: Urea-free 20-20-20 diluted to 1/4 strength, applied 3 weeks out of 4.
    • The Floral Trigger: 10°F to 15°F cooler nights (55°F–65°F) for 2 to 4 weeks in autumn.
    • Humidity: 45%–65% ambient humidity to prevent emerging buds from blasting (shriveling before opening).

      Explore More Plants
      Browse our Flowering Plants collection
      https://vaanmitra.com/flowering-plants

      Learn More About The Plant
      https://en.wikipedia.org/wiki/Orchid
  • Why Are My Orchid Leaves Turning Yellow? (Causes, Diagnostic Guide & Proven Fixes)

    Why Are My Orchid Leaves Turning Yellow? (Causes, Diagnostic Guide & Proven Fixes)

    Few sights cause orchid owners more anxiety than watching vibrant, emerald-green foliage slowly shift to a sickly yellow.

    While spotting a yellowing leaf is alarming, it is not an immediate death sentence. In fact, in many instances, yellow leaves are a standard part of an orchid’s natural aging cycle. In other cases, however, discoloration acts as an urgent distress signal pointing to watering errors, inadequate lighting, or pest damage.

    Below is a diagnostic guide explaining why orchid leaves turn yellow and the exact steps needed to nurse your plant back to peak health.

    Quick Diagnostic: What Is Your Orchid Telling You?

    Before adjusting your care routine, examine the pattern and texture of the yellowing foliage:

    Visual SymptomLeaf TextureMost Likely CausePrimary Fix
    Single bottom leaf turning pale yellowNormal / FirmNatural AgingLeave it alone; let it shed naturally
    Multiple leaves turning yellow from base upMushy, soft, translucentOverwatering & Root RotInspect roots, cut rot, repot in fresh bark
    Leaves wrinkling, dull yellow, leatheryThin, limp, paper-likeUnderwatering or Low HumidityDeep soak watering; increase humidity
    Top-facing leaves bleached yellow/whiteDry, brown edges, crispyDirect SunburnMove to bright, indirect filtered light
    Splotchy yellowing, webbing, or sticky residuePitted, mottled, stippledPests (Spider mites, Scale, Mealybugs)Wipe down with 70% isopropyl alcohol or neem oil
    Faint yellow patches across older leavesBrittle, slow growthNutrient Deficiency (Nitrogen/Iron)Apply balanced, diluted orchid fertilizer

    The 6 Most Common Causes of Yellow Orchid Leaves

    1. Natural Aging (The Harmless Cause)

    If your orchid is producing healthy new growth at the crown while only the very bottom leaf gradually yellows, dries out, and drops, your plant is simply shedding old tissue. Orchids reabsorb residual nutrients from bottom leaves to fuel new leaf and root development.

    • The Fix: Do not pull or tear the leaf off while it is still attached. Let it dry out completely until it detaches effortlessly with a gentle tug.

    2. Overwatering and Root Rot (The #1 Killer)

    Most indoor orchids (particularly Phalaenopsis, or moth orchids) are epiphytes—in nature, they grow anchored to tree bark with their roots exposed to air and rain cycles. When potted in dense medium or left sitting in standing water, their roots suffocate. Without oxygen, the roots rot, blocking hydration and essential minerals to the foliage, which triggers widespread, mushy yellowing.

    • Signs of Root Rot: Yellowing leaves feel spongy or limp. Roots inside the clear plastic pot look brown, black, slimy, or hollow rather than plump and silvery-green.
    • The Fix:
      1. Remove the orchid from its pot and gently shake off old potting media.
      2. Using sterilized shears, cut away all mushy, black, or stringy roots. Keep only firm, green or grayish-white roots.
      3. Spray healthy roots with 3% hydrogen peroxide or dust cut ends with ground cinnamon (a natural antifungal).
      4. Repot the plant into fresh, chunky pine bark mix inside a pot with ample drainage holes.
      5. Wait 3 to 4 days before watering lightly.

    3. Severe Underwatering or Extreme Low Humidity

    Underwatering displays similar yellowing to root rot, but with distinct textural differences. When dehydrated, an orchid draws moisture out of older leaves to protect its core.

    • Signs of Underwatering: Leaves appear dull, puckered, accordion-pleated, or wrinkled with dry, papery yellow tips. Healthy roots turn silvery-gray and shriveled rather than plump.
    • The Fix: Give the root zone a thorough 10-to-15-minute soak in room-temperature water. Ensure every drop of water drains completely from the pot afterward. Maintain ambient room humidity between 40% and 60% using a pebble tray or small room humidifier.

    4. Excessive Direct Sunlight (Sunburn)

    Orchids thrive in bright, indirect sunlight. Placing an orchid on an unshaded south- or west-facing windowsill exposes the foliage to harsh ultraviolet radiation and thermal stress.

    • Signs of Sunburn: Yellowing appears abruptly on the upper leaves directly facing the windowpane. The affected area often develops bleached white centers surrounded by dark, scorched brown margins.
    • The Fix: Relocate the plant immediately. Place it behind a sheer curtain or move it 2 to 3 feet away from bright windows. Sunburned patches cannot turn green again, but filtered light prevents further damage to surrounding foliage.

    5. Temperature Extremes and Cold Drafts

    Orchids prefer consistent temperatures between 65°F and 80°F (18°C–27°C). Exposure to sudden drops below 55°F (13°C)—such as sitting next to an air conditioning vent, drafty winter window, or exterior doorway—shocks the vascular system.

    • Signs of Temperature Shock: Rapid, uniform yellowing across multiple leaves within 24 to 48 hours, often accompanied by sudden bud drop.
    • The Fix: Move the orchid to a stable microclimate away from drafts, AC vents, radiators, and unsealed window frames.

    6. Pests and Sap-Sucking Insects

    Common houseplants pests such as spider mites, mealybugs, scale, and thrips pierce plant tissue to feed on sap, leaving behind unsightly yellow spots.

    • Signs of Infestation: Stippled yellow patches, fine webbing beneath leaf joints, cottony white clusters, or a sticky residue (honeydew).
    • The Fix: Isolate the plant. Swab visible insects using a cotton swab dipped in 70% isopropyl alcohol. Follow up by spraying the foliage—especially the undersides of the leaves—with insecticidal soap or diluted horticultural neem oil once a week for three consecutive weeks.

    Proactive Care Checklist: Keeping Orchid Foliage Green

    • Water by Root Color, Not the Calendar: Water only when roots in the pot appear silvery-gray and the bark mix feels dry 1 inch below the surface. If roots are bright green, wait.
    • Never Leave Standing Water in the Crown: Always water around the base of the plant. If water splashes into the central crevice (crown), blot it dry immediately with a clean paper towel to prevent crown rot.
    • Use Specialized Media: Never plant orchids in standard potting soil. Stick to aerated, well-draining media like coarse fir bark, perlite, charcoal, or sphagnum moss.
    • Feed Weakly, Weekly: Apply a balanced, urea-free orchid fertilizer (such as 20-20-20) diluted to one-quarter strength once every two weeks during the active spring and summer growing phases. Flush the potting mix with plain water once a month to prevent root burn from mineral salts.

    Frequently Asked Questions

    Should I cut off yellow orchid leaves?

    If the leaf is merely pale yellow from natural aging, let it fall off naturally so the orchid absorbs its stored nutrients. However, if the leaf is mushy, foul-smelling, or showing signs of bacterial or fungal infection, cut it away with a sterilized blade approximately 1/2 inch from the stem, and dab the cut with cinnamon powder.

    Can yellow orchid leaves turn green again?

    No. Once chlorophyll breaks down and a leaf turns yellow, it cannot revert to green. Focus care on resolving the underlying trigger to support emerging leaves.

    Does the ice cube watering method cause yellow leaves?

    Yes, it can. Cold ice applied directly to tropical root systems shocks the tissue and often leaves the bottom of the pot bone-dry while freezing the top roots, resulting in dehydration-induced leaf yellowing. Water with tepid, room-temperature water instead.

    Know more about Orchid: https://en.wikipedia.org/wiki/Orchid

    Buy our Orchid plants: https://vaanmitra.in/orchids/

  • The Ultimate Guide to Orchids Care: Planting, Growing, and Blooming Secrets Revealed

    The Ultimate Guide to Orchids Care: Planting, Growing, and Blooming Secrets Revealed

    Orchids have long been considered the crown jewels of the houseplant world. With their architectural elegance, vibrant colors, and blooms that can last for months, they bring a touch of tropical luxury to any room. However, they also carry an unfair reputation for being finicky, delicate divas that are impossible to keep alive once their initial blooms fade.

    In truth, these botanical marvels are remarkably hardy and rewarding once you understand their natural rhythm. Whether you are bringing home your first classic Moth Orchid (Phalaenopsis) or you are looking to expand a growing greenhouse collection, mastering their care comes down to one simple rule: mimicking their wild, tropical habitats.

    Here is your comprehensive, step-by-step guide to planting, watering, and keeping your orchids thriving year after year.
    Buy Orchids plant here: https://vaanmitra.in/product-category/buy-flowering-plants-online-india/orchids/

    1. Understanding Your Plant: The Epiphyte Secret

    Before you can care for an orchid, you must understand how it grows in the wild. Most orchids grown as houseplants are epiphytes (air plants). This means that in their native tropical rainforests, they do not grow in the dirt. Instead, they cling to the bark of trees high up in the forest canopy, absorbing moisture and nutrients from the humid air, rain, and decaying leaves around them.

    Because of this, treating an orchid like a standard potted houseplant is a recipe for disaster. Their roots need to breathe just as much as their leaves do.

    2. Planting and Potting: Throw Away the Soil

    Because they are epiphytes, orchids will quickly suffocate and rot if planted in traditional, dense potting soil.
    • The Perfect Potting Medium: You need a specialized, airy mix that provides excellent drainage while retaining a little bit of moisture. The best orchid mixes contain chunky fir bark, perlite, horticultural charcoal, and sometimes a bit of sphagnum moss.
    • Choosing the Right Pot: Transparent plastic containers with ample drainage holes and side slits are the gold standard. Orchid roots actually photosynthesize and require airflow. Clear pots also allow you to monitor root hydration and health without disturbing the plant. You can always slip this clear plastic liner into a decorative ceramic pot (a cachepot) for display.
    • When and How to Repot: You should refresh the potting mix every 1 to 2 years, as bark eventually breaks down and becomes too dense. The ideal time to repot is just after the blooming cycle concludes and you see new green root tips beginning to emerge. Carefully remove the plant, trim away any dead, papery, or mushy roots with sterilized snips, and gently settle it into fresh bark.

    3. Light and Temperature: Bright, Filtered Warmth

    In the wild, orchids sit beneath thick forest canopies, basking in dappled sunlight rather than harsh, direct rays.

    • Optimal Light Levels: Place your orchids in medium-to-bright indirect light. An east-facing window is usually perfect. If you only have south or west-facing windows, soften the intense light with a sheer curtain to prevent the leaves from burning.
    • Reading the Leaves: Your orchid will tell you if it is happy with its lighting. Vibrant, grassy-green foliage signals optimal light. Dark, forest-green leaves suggest the plant is stretching for more sun and may not rebloom. Conversely, yellowing leaves or scorched, reddish-purple edges are a warning of sunburn.
    • Temperature Swings: Orchids thrive in daytime temperatures between 20°C and 28°C and nighttime lows around 15°C to 18°C. A slight drop in temperature at night is incredibly important—it is often the exact environmental trigger an orchid needs to initiate a new flower spike.

    4. Watering and Humidity: The Soak-and-Dry Rhythm

    Overwatering is the single most common cause of orchid death. It is crucial to aim for a careful balance rather than a rigid calendar schedule (like “water every Sunday”).

    • The Color Test: Look at the roots through your clear plastic pot. Silvery-gray or white roots mean it is time to water. Plump, vibrant green roots mean the plant is still fully hydrated. Leave it alone!
    • The Soak Method: When it is time to water, take the plant to the sink. Run lukewarm water generously through the bark mix for 30 to 60 seconds, letting it flush out salts and soak the bark. Let it drain completely. Never leave the pot standing in a saucer of pooled water.
    • Beware of Crown Rot: When watering, be very careful not to let water pool in the “crown” (the top center where new leaves emerge) or in the joints of the leaves. If water gets trapped there, it can cause lethal rot. Gently dab away any sitting water with a paper towel.
    • Humidity: Orchids love humidity! Aim for ambient humidity between 50% and 70%. You can achieve this by grouping houseplants together, placing the orchid pot on a pebble tray filled with water (ensuring the pot sits above the water line, not in it), or running a small humidifier nearby. This prevents delicate flower buds from drying out and dropping (a phenomenon known as “bud blast”).

    5. Feeding for Spectacular Blooms

    Orchids are light feeders, but they do need nutrients to produce those massive, long-lasting floral displays.

    • The “Weakly, Weekly” Rule: Use a balanced, water-soluble orchid fertilizer. Dilute it to one-quarter of the strength recommended on the label, and feed the plant every time you water during its active growing season (spring and summer).
    • Flush the Pot: Once a month, water the plant with plain, unfertilized water to flush out any accumulated mineral salts that could burn the sensitive roots. Pause fertilizing during the winter dormancy period.

    6. Pruning and Encouraging New Blooms

    The flowers will eventually fade and drop off—this is completely natural. Once the show is over, your orchid will shift its energy toward growing new leaves and roots.

    • Trimming the Spike: Look at the bare flower stem (the spike). If the spike stays firm and green, you can trim it about one inch above the highest “node” (the little bumps on the stem) beneath where the lowest flower was. This often encourages a secondary branch of flowers to grow from that node.
    • Starting Fresh: If the spike turns brown, yellow, and brittle, it is dead. Cut it back cleanly all the way to the base of the plant. With proper care and a slight temperature drop in the autumn, the plant will push out a brand new spike next season.

    7. Common Troubleshooting

    • Wrinkled, Leathery Leaves: This usually indicates a lack of water, but ironically, it can be caused by overwatering. Rotted roots can’t absorb water, leaving the plant dehydrated. Check the root system immediately.
    • Dropping Unopened Buds: Usually caused by sudden drafts, extreme temperature changes, low humidity, or being placed too close to a ripening fruit bowl (which emits ethylene gas).

    Know more about Orchids plant: https://en.wikipedia.org/wiki/Orchid

  • Hibiscus Plant Care Guide: How to Grow Healthy Hibiscus Plants at Home 🌺

    Hibiscus Plant Care Guide: How to Grow Healthy Hibiscus Plants at Home 🌺

    Introduction to Hibiscus Plants

    Hibiscus plants are among the most beautiful and widely grown flowering plants in tropical and subtropical regions. Known for their large, vibrant blooms and lush green foliage, hibiscus plants instantly enhance the beauty of any garden, balcony, terrace, or home entrance.

    The hibiscus flower belongs to the Malvaceae family and includes hundreds of species. The most popular species grown in Indian gardens is Hibiscus rosa-sinensis, also known as the Chinese hibiscus or tropical hibiscus.

    These plants produce large trumpet-shaped flowers in various colors such as red, pink, white, peach, yellow, and orange. Their striking appearance and long blooming season make hibiscus one of the favorite plants among gardeners and plant enthusiasts.

    Hibiscus plant are not only admired for their beauty but also for their medicinal and cultural importance. In many parts of India, hibiscus flowers are used in traditional medicine, herbal teas, and religious rituals.

    With proper care and the right growing conditions, the plants can bloom throughout the year and provide a stunning display of colorful flowers in your garden.

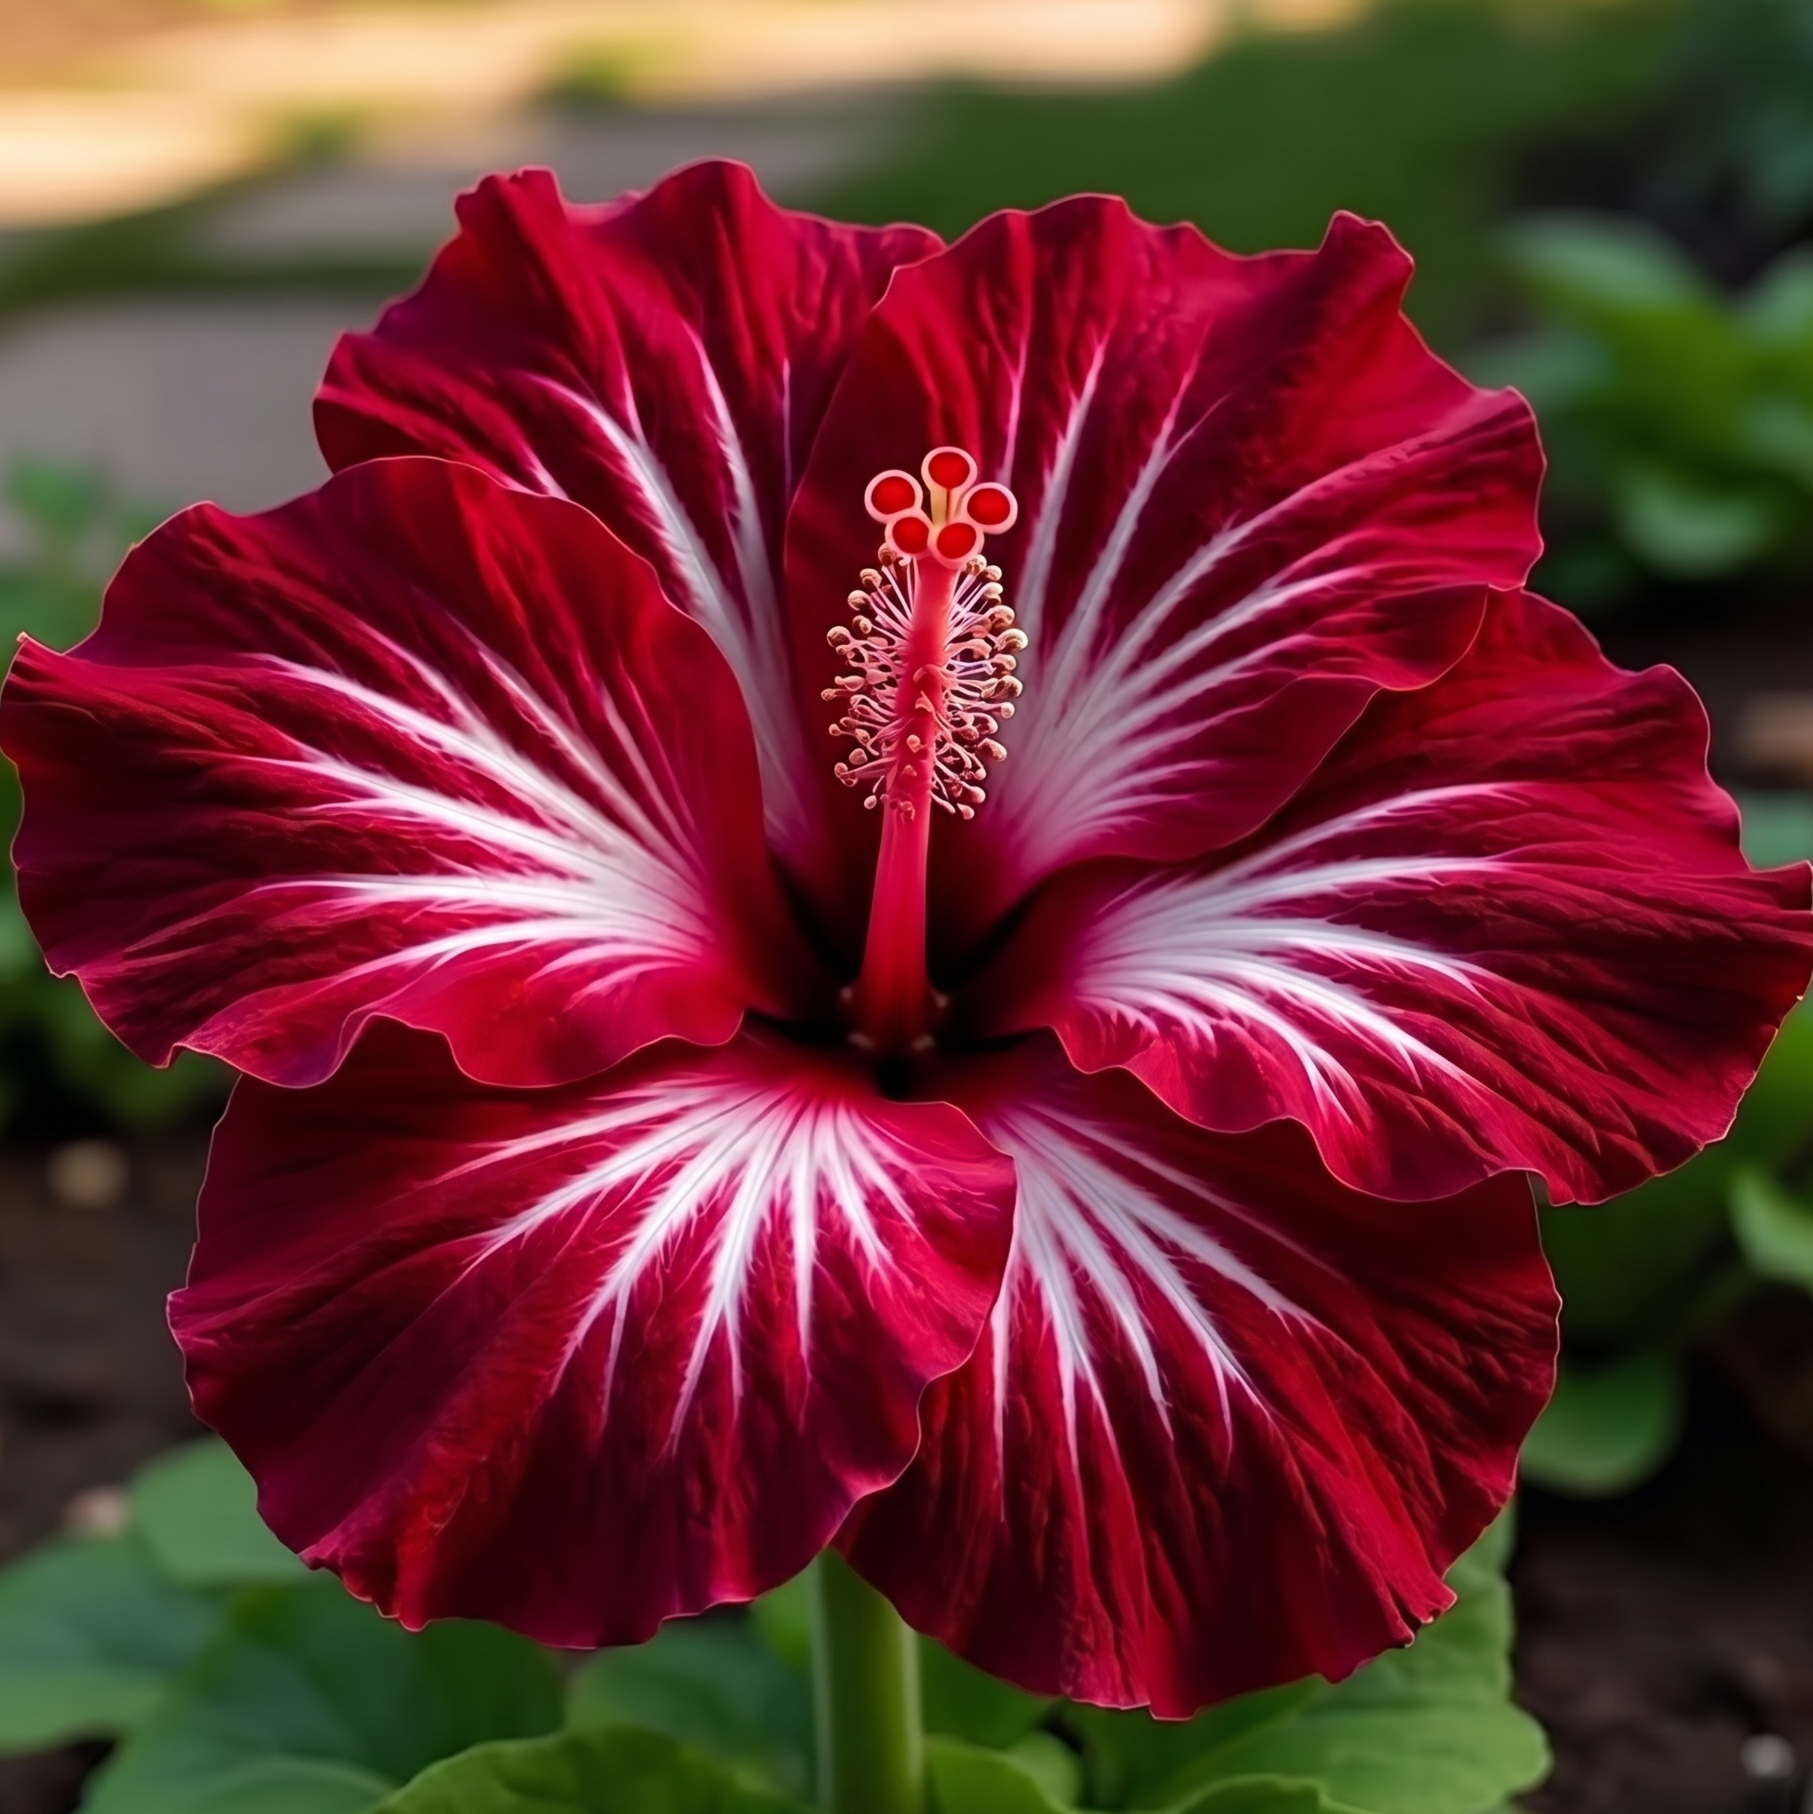
    red hibiscus flower plant

    Hibiscus Plants Overview

    FeatureDetails
    Botanical NameHibiscus rosa-sinensis
    Common NameHibiscus, Shoe Flower
    Plant TypeFlowering Shrub
    SunlightFull Sun
    Water RequirementModerate
    Soil TypeWell-drained fertile soil
    Flower ColorsRed, Pink, White, Peach, Yellow
    Bloom SeasonYear round in warm climates
    Difficulty LevelEasy

    Why Hibiscus Plants Are Popular

    Hibiscus plants are extremely popular among gardeners for several reasons.

    1. Large Beautiful Flowers

    Hibiscus flowers are large, colorful, and eye-catching. Their trumpet-shaped petals create a dramatic appearance that instantly enhances garden aesthetics.

    2. Long Blooming Season

    Unlike many flowering plants that bloom only during certain seasons, this plants can produce flowers throughout the year in warm climates.

    3. Perfect for Indian Climate

    The plants thrive in warm tropical climates like India, making them perfect for home gardens.

    4. Easy to Grow

    These plants require simple care and can grow well in pots or garden soil.

    5. Medicinal Benefits

    Hibiscus flowers are used in herbal medicine and natural hair care products.

    white hibiscus flower plant

    Types of Hibiscus Plants

    There are many varieties of hibiscus plants available worldwide. Some of the most popular types include:

    Tropical Hibiscus

    Tropical hibiscus is the most common variety grown in home gardens. It produces large colorful flowers and thrives in warm climates.

    Double Petal Hibiscus

    Double hibiscus varieties produce layered petals that look very decorative and elegant.

    Fringed Hibiscus

    These varieties have unique fringed or ruffled petals that make the flowers look very exotic.

    Hardy Hibiscus

    Hardy hibiscus plants can tolerate colder temperatures and produce extremely large flowers.

    double red hibiscus flower

    How to Grow Hibiscus Plants at Home

    Growing hibiscus plants at home is easy if you provide the right conditions.

    Choosing the Right Location

    The plants require plenty of sunlight to grow and bloom properly.

    They should receive:

    6–8 hours of sunlight daily.

    Without sufficient sunlight, the plant may produce fewer flowers.

    Best Soil for Hibiscus Plants

    This plants prefer rich, well-drained soil.

    Ideal soil mixture:

    40% garden soil
    30% compost
    20% sand
    10% cocopeat

    This mixture provides proper drainage and nutrients.


    Watering Requirements

    This plants need regular watering but should not be overwatered.

    Watering tips:

    • Water when top soil becomes dry
    • Avoid waterlogging
    • Ensure proper drainage

    During hot summer months, this plants may require more frequent watering.

    fringed hibiscus flower

    Pruning Hibiscus Plants

    Pruning helps maintain the shape of the plant and encourages new growth.

    Best time for pruning:

    Late winter or early spring.

    Pruning benefits:

    • Encourages new branches
    • Promotes more flowers
    • Keeps plant healthy

    Always remove:

    • Dead branches
    • Weak stems
    • Diseased parts

    Fertilizing Hibiscus Plants

    This plants require regular feeding to produce abundant flowers.

    Recommended fertilizers:

    • Vermicompost
    • Cow dung manure
    • Bone meal
    • Banana peel fertilizer

    Fertilize every 2–3 weeks during the growing season.

    peach hibiscus flower plant

    Benefits of Hibiscus Plants

    This plants provide many benefits beyond their beauty.

    Enhances Garden Beauty

    Large vibrant flowers instantly improve the appearance of any garden.

    Medicinal Uses

    Hibiscus flowers are used to make herbal teas and traditional medicines.

    Hair Care Benefits

    Hibiscus extracts are widely used in hair oils and shampoos to promote hair growth.

    Attracts Pollinators

    Hibiscus flowers attract bees and butterflies, helping improve garden biodiversity.


    Common Problems in Hibiscus Plants

    Although this plants are relatively easy to grow, some issues may occur.

    Yellow Leaves

    Caused by overwatering or nutrient deficiency.

    Pest Infestation

    Common pests include aphids, spider mites, and whiteflies.

    Solution: Spray neem oil regularly.

    Bud Drop

    Occurs when plant experiences stress from temperature changes or improper watering.


    Landscaping Ideas with Hibiscus

    This plants are extremely versatile in landscaping.

    Popular uses include:

    Garden borders
    Balcony decoration
    Terrace gardening
    Hedge plants
    Potted ornamental plants

    Their bright flowers make them a perfect focal point in any landscape design.


    Where to Buy Hibiscus Plants Online in India

    If you want to grow beautiful flowering plants in your home garden, this plants are an excellent choice.

    You can buy healthy hibiscus plants online from VaanMitra and get them delivered safely to your doorstep.

    At VaanMitra we provide:

    Healthy nursery plants
    Secure packaging
    Affordable prices
    Delivery across India


    Conclusion

    Hibiscus plants are among the most beautiful and rewarding flowering plants for home gardens. Their vibrant colors, large blooms, and year-round flowering make them a favorite choice for gardeners.

    With proper sunlight, watering, fertilization, and pruning, hibiscus plants can thrive and produce stunning flowers that enhance the beauty of any space.

    Whether grown in pots, balconies, terraces, or garden beds, hibiscus plants bring tropical elegance and natural charm to your surroundings.

    If you are looking for a vibrant, easy-to-grow flowering plant, hibiscus is undoubtedly one of the best choices for your garden.

    To know about more flowering plants visit :

    https://vaanmitra.in/floweringplants

    To know about more Hibiscus plants visit : https://en.wikipedia.org/wiki/Hibiscus

  • Bougainvillea Plant Care Guide: How to Grow Beautiful Multicolor Bougainvillea at Home 🌸

    Bougainvillea Plant Care Guide: How to Grow Beautiful Multicolor Bougainvillea at Home 🌸

    Introduction to Bougainvillea Plant

    Bougainvillea is one of the most beautiful flowering plants that can transform any garden, balcony, or terrace into a colorful paradise. Known for its vibrant pink, red, white, orange, and purple blooms, Bougainvillea is widely loved by gardeners because of its stunning appearance and low maintenance nature.

    Originally native to South America, this plants are now widely grown across tropical and subtropical regions of the world, especially in India. These plants thrive in warm climates and bloom almost throughout the year when grown in the right conditions.

    The most attractive feature of Bougainvillea is its bright colorful bracts that surround the small white flowers. These bracts give the illusion of large vibrant blooms and make the plant look incredibly decorative.

    Whether you want to decorate your garden wall, balcony railing, terrace garden, or home entrance, this plants are an excellent choice.


    Bougainvillea Plant Overview

    FeatureDetails
    Botanical NameBougainvillea
    Plant TypeFlowering Shrub / Vine
    SunlightFull Sun
    Water RequirementLow to Moderate
    Flower ColorsPink, Red, White, Orange, Purple
    Ideal ClimateTropical & Subtropical
    Bloom SeasonAlmost Year Round
    Difficulty LevelEasy

    Why Bougainvillea Plants Are So Popular

    bougainvillea climbing plant on garden wall

    Bougainvillea plants are extremely popular among gardeners for several reasons.

    1. Beautiful Colorful Flowers

    Bougainvillea produces vibrant and eye-catching bracts in multiple colors including red, pink, orange, white, purple, and even mixed colors. These bright flowers make the plant perfect for landscape decoration.

    2. Very Low Maintenance

    Unlike many flowering plants, Bougainvillea requires minimal care. It can survive in dry conditions and still produce beautiful blooms.

    3. Fast Growing Plant

    This plants grow quickly and can easily cover walls, fences, pergolas, and trellises.

    4. Perfect for Indian Climate

    Bougainvillea grows extremely well in India’s warm climate and tolerates high temperatures easily.

    5. Excellent for Pots and Containers

    You can easily grow Bougainvillea in pots, making it ideal for balcony gardening and terrace gardens.


    Types of Bougainvillea Plants

    There are many varieties of Bougainvillea plants available in nurseries and online plant stores.

    1. Bougainvillea Spectabilis

    This is one of the most common varieties with vibrant purple and pink flowers.

    2. Introduction to Bougainvillea Plant

    Bougainvillea Glabra is known for its smooth leaves and bright colorful blooms.

    3. Dwarf Bougainvillea

    Dwarf varieties are perfect for pots, balcony gardens, and indoor decorative spaces.

    4. Multicolor Bougainvillea

    Multicolor Bougainvillea plants produce flowers in multiple shades such as white, pink, red, and orange on the same plant, making them extremely attractive.


    How to Grow Bougainvillea Plants at Home

    Growing Bougainvillea plants at home is quite simple if you follow a few basic gardening principles.

    Choosing the Right Location

    This plants need plenty of sunlight to bloom properly.

    Ideal conditions include:

    • 6 to 8 hours of direct sunlight
    • Warm temperature
    • Good air circulation

    Without sufficient sunlight, the plant may produce more leaves but fewer flowers.


    Best Soil for Bougainvillea Plants

    This plants grow best in well-draining soil.

    Recommended soil mix:

    • 40% Garden Soil
    • 30% Sand
    • 20% Compost
    • 10% Cocopeat

    This mixture allows proper drainage and prevents root rot.

    Bougainvillea plants actually bloom better in slightly poor soil conditions rather than overly fertile soil.


    Watering Requirements

    This plants do not like excessive watering.

    Best watering practice:

    • Water only when soil becomes dry
    • Avoid waterlogging
    • Ensure pot has drainage holes

    Overwatering can reduce flowering and cause root damage.


    Sunlight Requirement

    This plants require full sunlight for proper growth and blooming.

    Minimum sunlight requirement:

    6 hours daily

    Best results:

    8 hours of sunlight

    More sunlight results in more flowers.


    Fertilizer for Bougainvillea Plants

    This plants do not require heavy feeding.

    However, occasional fertilization can boost flowering.

    Best fertilizers include:

    • Vermicompost
    • Bone meal
    • Organic compost
    • Banana peel fertilizer

    Apply fertilizer once every 3–4 weeks during the growing season.

    Avoid excessive nitrogen fertilizer because it promotes leaf growth instead of flowers.


    Pruning Bougainvillea Plants

    pruning bougainvillea plant

    Pruning helps maintain the shape of the plant and encourages more flowering.

    Best time for pruning:

    • After flowering cycle
    • Late winter or early spring

    Remove:

    • Dead branches
    • Weak stems
    • Overgrown shoots

    Pruning stimulates new branches that produce more blooms.


    Growing Bougainvillea in Pots

    bougainvillea plant growing in pot

    Bougainvillea grows extremely well in containers.

    Recommended pot size:

    • Minimum 12–16 inches

    Pot material options:

    • Clay pots
    • Cement pots
    • Plastic pots

    Make sure the pot has good drainage holes.

    Bougainvillea actually blooms better when the roots are slightly restricted inside the pot.


    Bougainvillea Propagation Methods

    Bougainvillea plants can be propagated easily using several methods.

    Stem Cuttings

    The most common method.

    Steps:

    1. Cut a semi-hardwood stem
    2. Remove lower leaves
    3. Dip in rooting hormone
    4. Plant in moist soil
    5. Keep in partial shade

    Roots usually develop within 3–4 weeks.


    Air Layering

    Air layering is another effective propagation technique.

    Steps:

    1. Select healthy branch
    2. Remove bark section
    3. Wrap with moist moss
    4. Cover with plastic

    Roots develop within 4–6 weeks.


    Common Problems in Bougainvillea Plants

    Although the plants are hardy, some issues may occur.

    1. No Flowers

    Causes:

    • Lack of sunlight
    • Too much fertilizer
    • Overwatering

    Solution:

    Provide full sunlight and reduce watering.


    2. Yellow Leaves

    Causes:

    • Overwatering
    • Poor drainage
    • Nutrient deficiency

    Solution:

    Improve soil drainage and reduce watering.


    3. Pest Problems

    Common pests include:

    • Aphids
    • Spider mites
    • Mealybugs

    Solution:

    Use neem oil spray every 10 days.


    Bougainvillea Landscaping Ideas

    bougainvillea balcony garden decoration

    Bougainvillea plants can be used creatively in landscaping.

    Popular uses include:

    • Garden walls
    • Archways
    • Pergolas
    • Balcony railings
    • Terrace gardens
    • Hanging baskets

    Their vibrant flowers instantly enhance the beauty of any outdoor space.


    Benefits of Bougainvillea Plants

    This plants provide many advantages beyond their beauty.

    Improves Garden Aesthetics

    The vibrant colors make gardens look lively and attractive.

    Low Maintenance

    Perfect for beginner gardeners.

    Drought Tolerant

    Bougainvillea can survive in dry conditions.

    Excellent Natural Fence

    The thorny branches create a natural protective hedge.


    Bougainvillea Plant Care Tips

    Follow these simple tips for healthy plants:

    • Provide full sunlight
    • Avoid excessive watering
    • Prune regularly
    • Use well-drained soil
    • Fertilize occasionally
    • Protect from frost

    With proper care, Bougainvillea plants can bloom for many years.


    Where to Buy Bougainvillea Plants Online in India

    If you want to decorate your home garden with colorful flowers, Bougainvillea plants are an excellent choice.

    You can easily buy healthy Bougainvillea plants online from VaanMitra and get them delivered safely to your home.

    At VaanMitra, we provide:

    • Healthy nursery-grown plants
    • Secure packaging
    • Fast delivery across India
    • Affordable prices

    Bougainvillea plants from VaanMitra can instantly enhance your garden beauty.


    Conclusion

    healthy bougainvillea flowering plant

    Bougainvillea plants are one of the best flowering plants for Indian gardens. Their vibrant colors, fast growth, and low maintenance requirements make them perfect for beginners and experienced gardeners alike.

    Whether you grow them in pots, balcony gardens, terrace gardens, or landscape designs, this plants will add a stunning touch of natural beauty to your surroundings.

    With proper sunlight, well-drained soil, and minimal watering, Bougainvillea plants can bloom abundantly and transform your garden into a colorful paradise.

    If you are looking for a beautiful, hardy, and long-lasting flowering plant, Bougainvillea is undoubtedly one of the best choices.

    Buy Bougainvillea Plant Here: https://vaanmitra.in/bougainvillea-plant

    Know More Bougainvillea Plant Here: https://en.wikipedia.org/wiki/Bougainvillea

  • Best Fertilizer for Rose Plants: Complete Guide for Bigger Blooms 🌹

    Best Fertilizer for Rose Plants: Complete Guide for Bigger Blooms 🌹

    Introduction

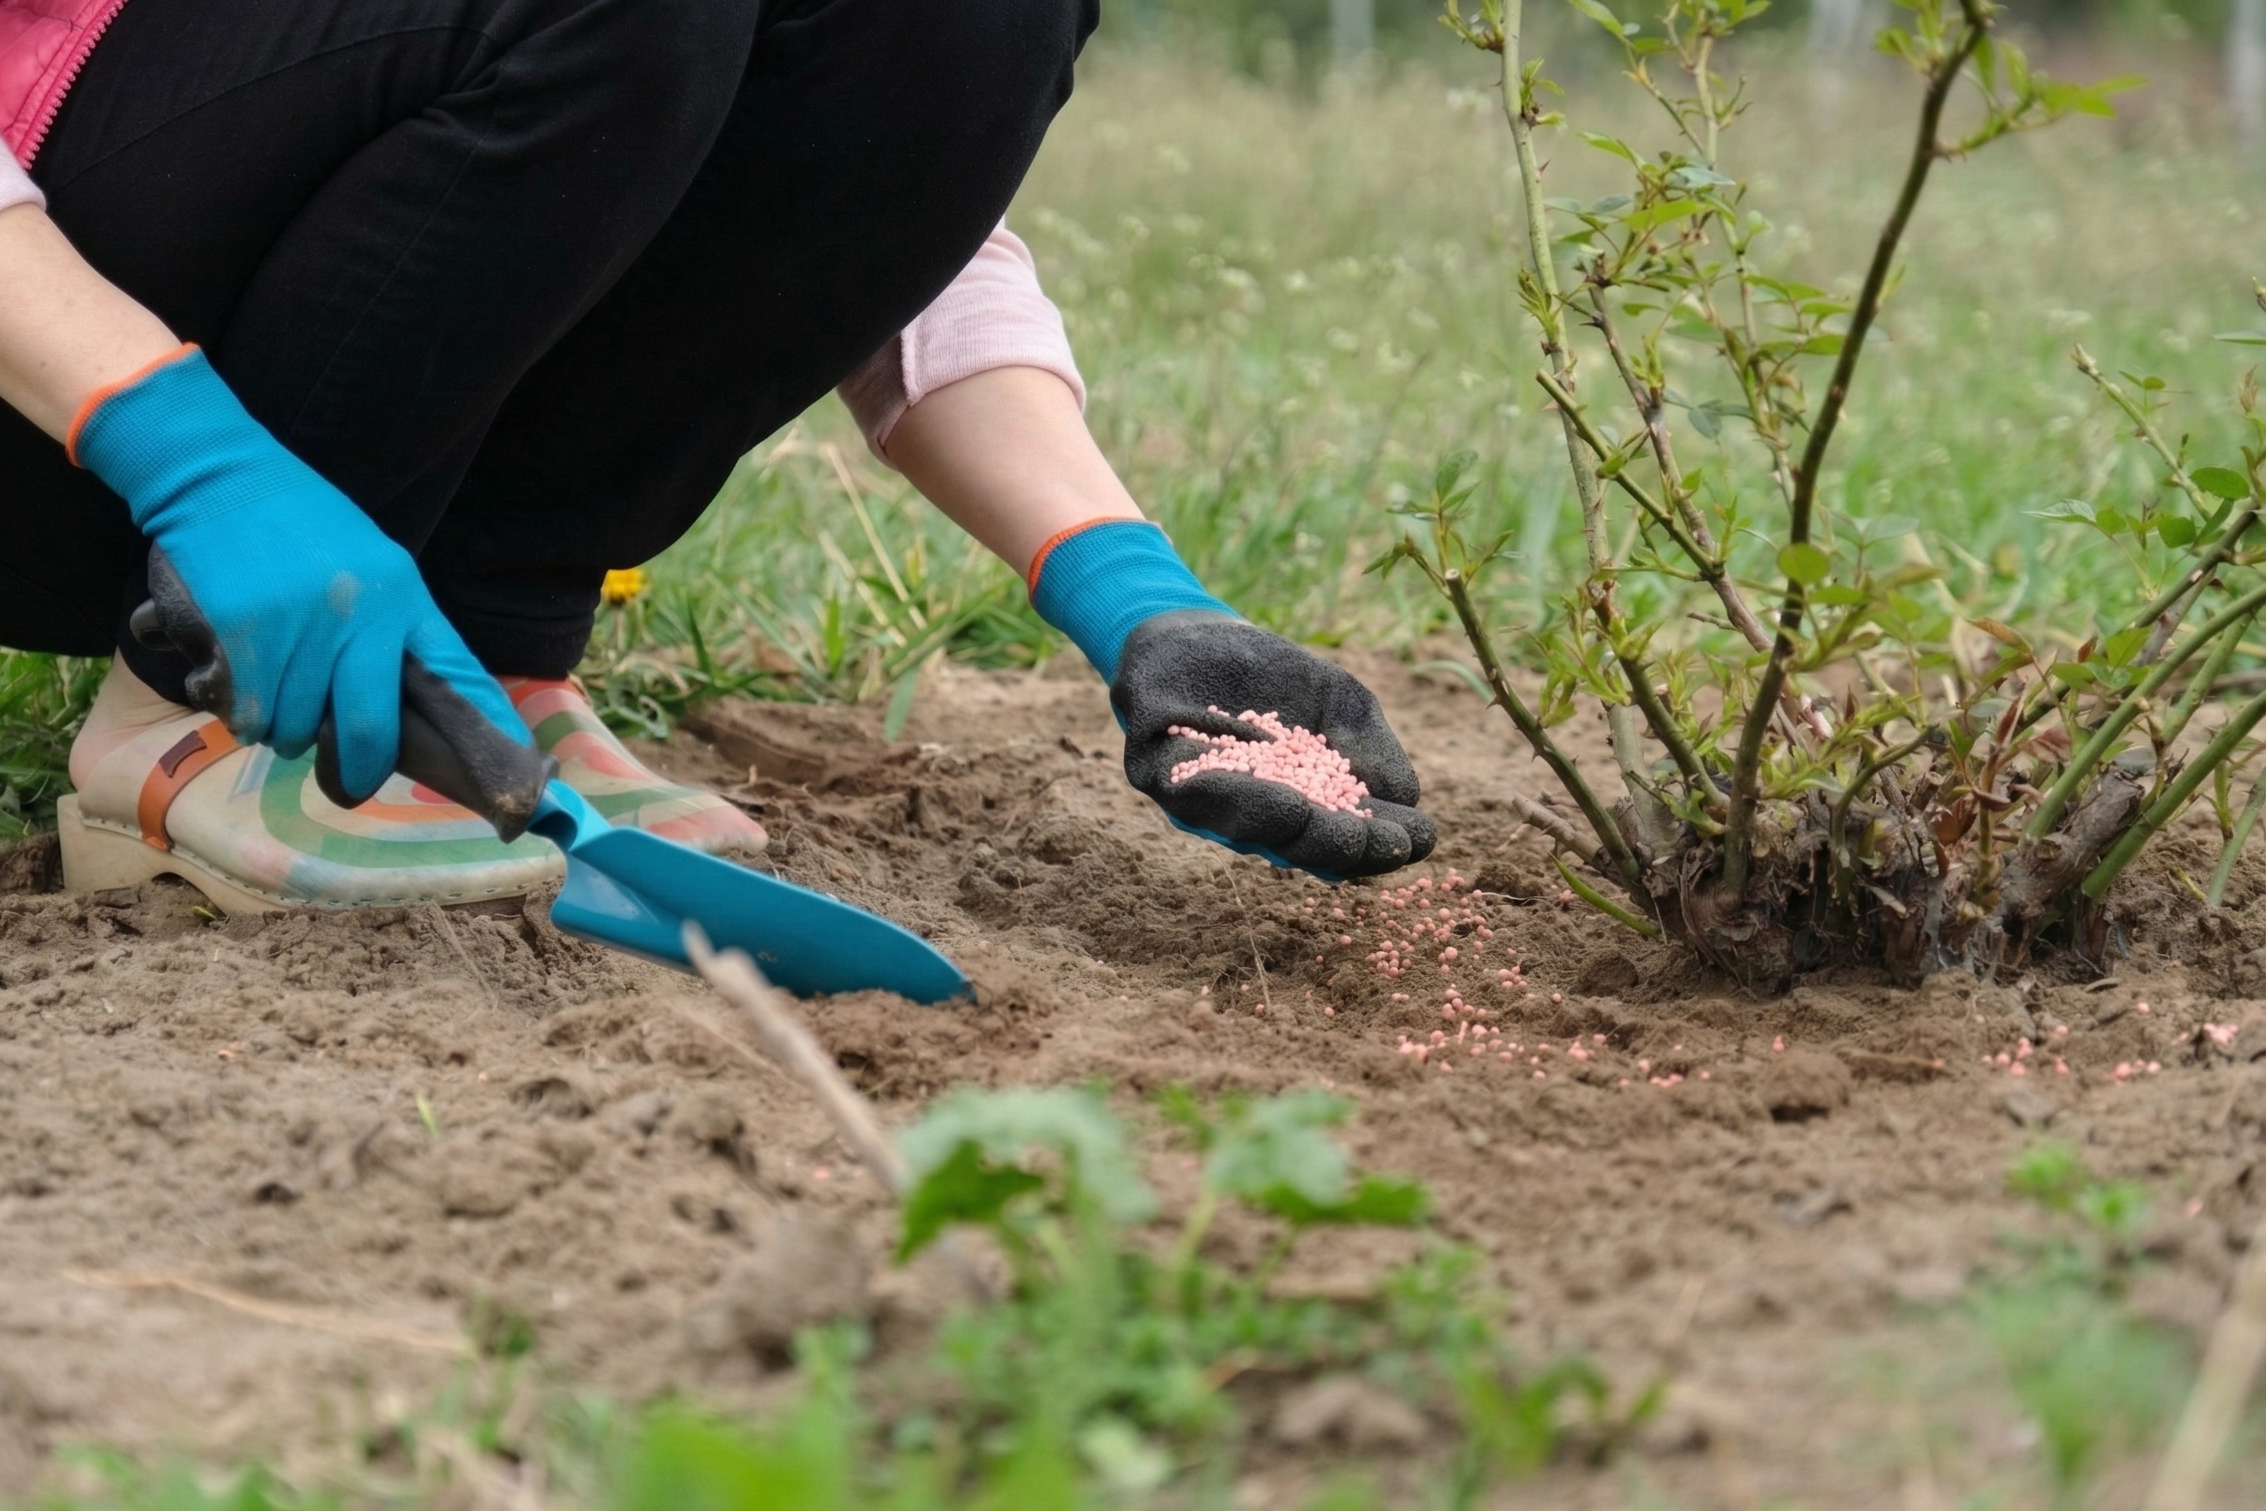
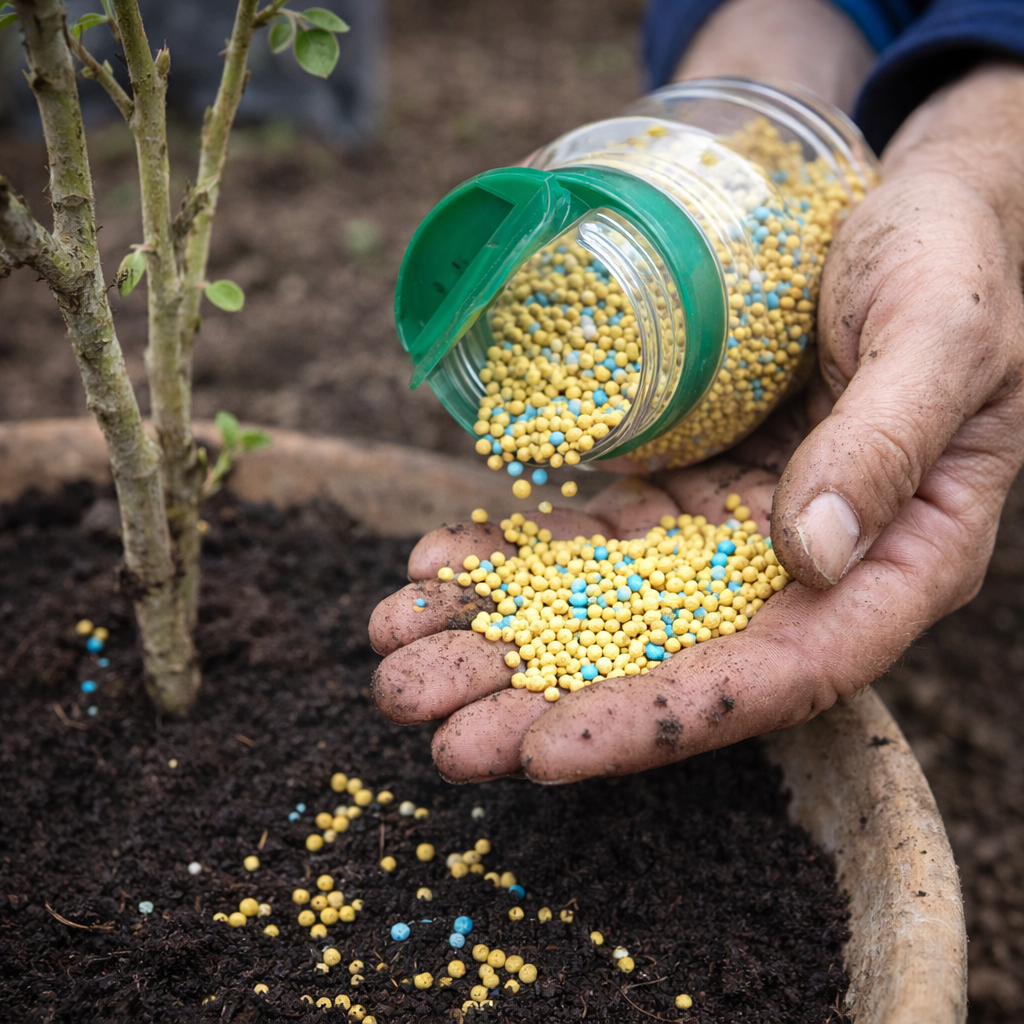
    Roses are among the most beautiful and popular flowering plants grown in gardens worldwide. However, to produce vibrant flowers and healthy foliage, roses require proper nutrition. Using the best fertilizer for rose plants ensures strong growth, abundant blooms, and long-lasting plants.

    Roses are considered heavy feeders, which means they require regular nutrients throughout the growing season. Without proper fertilization, rose plants may show poor growth, weak stems, fewer flowers, and yellowing leaves.

    In this guide, you will learn everything about the best fertilizer for rose plants in India, including organic fertilizers, feeding schedules, nutrient requirements, and expert gardening tips.


    Why Rose Plants Need Fertilizer

    Rose plants consume large amounts of nutrients from the soil to produce their beautiful flowers. Over time, the soil becomes depleted of essential nutrients.

    Providing the best fertilizer for rose plants helps in:

    • promoting strong root development
    • encouraging new shoots
    • producing larger flowers
    • improving plant health
    • increasing flowering frequency

    Without proper Fertilizer for Rose Plants, even healthy rose plants may stop blooming.


    Essential Nutrients for Rose Plants

    Rose plants require three primary nutrients for healthy growth.

    Nitrogen (N)

    Nitrogen promotes healthy leaf and stem growth.

    Benefits include:

    • lush green foliage
    • stronger plant structure
    • improved photosynthesis

    However, excessive nitrogen may reduce flowering.


    Phosphorus (P)

    Phosphorus is essential for flower production and root development.

    It helps in:

    • larger blooms
    • stronger roots
    • better flowering cycles


    Potassium (K)

    Potassium improves overall plant health and disease resistance.

    It supports:

    • stronger stems
    • improved immunity
    • longer-lasting flowers


    Best Organic Fertilizers for Rose Plants

    Organic fertilizers are highly recommended for roses because they improve soil health and provide slow-release nutrients.

    Vermicompost

    Vermicompost is one of the best fertilizers for rose plants.

    Benefits:

    • rich in nutrients
    • improves soil structure
    • enhances microbial activity
    • promotes strong flowering

    Apply vermicompost every 15–20 days.


    Cow Dung Manure

    Cow dung manure is widely used in Indian gardening.

    Advantages:

    • natural organic fertilizer
    • improves soil fertility
    • provides balanced nutrients

    Use well-decomposed manure to avoid root damage.


    Bone Meal

    Bone meal is rich in phosphorus, making it excellent for rose plants.

    Benefits include:

    • stronger roots
    • increased flower production
    • healthier plant growth

    Apply once every 30–40 days.


    Neem Cake Fertilizer

    Neem cake is both a fertilizer and a natural pest repellent.

    Benefits:

    • improves soil health
    • prevents soil pests
    • provides slow-release nutrients


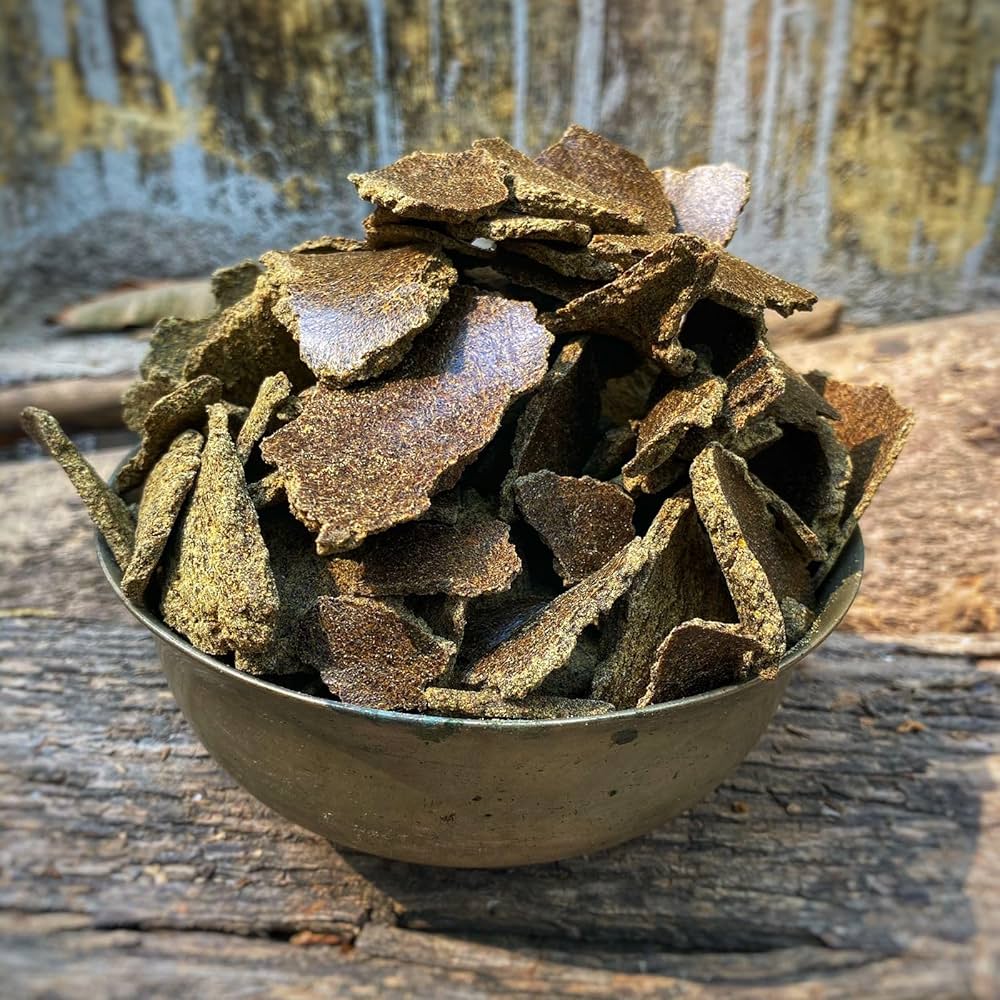
    Mustard Cake Fertilizer

    Mustard cake fertilizer is a powerful organic fertilizer used by many experienced gardeners.

    Benefits:

    • boosts flowering
    • improves plant vigor
    • provides essential nutrients

    Dilute mustard cake solution before applying.


    Liquid Fertilizers for Rose Plants

    Liquid fertilizers are quickly absorbed by plants and can improve flowering significantly.

    Compost Tea

    Compost tea is made by soaking compost in water.

    Benefits:

    • quick nutrient absorption
    • improves soil microbes
    • enhances plant growth


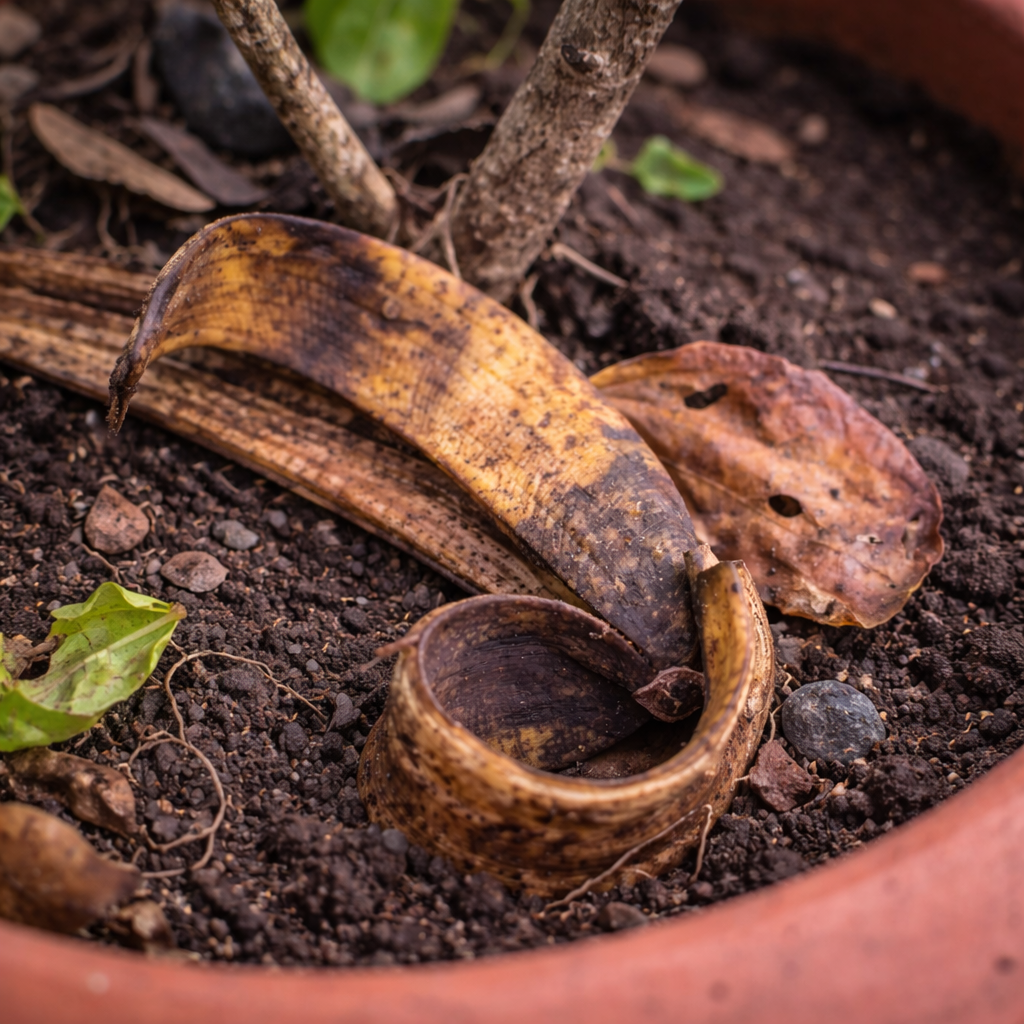
    Banana Peel Fertilizer

    Banana peels contain potassium, which promotes flowering.

    Simply soak banana peels in water and use the solution as fertilizer.


    Fertilizer Schedule for Rose Plants

    Providing fertilizer at the right time is essential.

    Spring Feeding

    Spring is the active growing season.

    Feed roses every 15 days using organic fertilizers.


    Summer Feeding

    Reduce fertilizer slightly during extreme heat.

    Apply light feeding every 20 days.


    Monsoon Feeding

    Avoid heavy fertilization during heavy rains.

    Ensure proper drainage.


    Winter Feeding

    Winter is the peak flowering season for roses in India.

    Feed the plant regularly for maximum blooms.


    Signs Your Rose Plant Needs Fertilizer

    Rose plants show clear symptoms when nutrients are lacking.

    Common signs include:

    • yellow leaves
    • weak stems
    • small flowers
    • slow growth
    • fewer blooms

    Providing the best Fertilizer for Rose Plantsfor rose plants can quickly restore plant health.


    Fertilizer Tips for Rose Plants in Pots

    Container-grown roses need more frequent fertilization.

    Tips:

    • fertilize every 15 days
    • use organic fertilizers
    • ensure proper drainage
    • avoid overfertilizing


    Common Fertilizing Mistakes

    Many gardeners make mistakes while fertilizing roses.

    Avoid these mistakes:

    • overfertilizing
    • using fresh manure
    • fertilizing dry soil
    • ignoring soil drainage

    Always water the plant before applying Fertilizer for Rose Plants.


    Expert Tips for Bigger Rose Blooms

    Professional gardeners follow these techniques to boost flowering.

    • provide full sunlight
    • prune regularly
    • remove dried flowers
    • fertilize consistently
    • maintain proper watering

    These practices ensure maximum blooming throughout the year.


    Conclusion

    Using the best fertilizer for rose plants is essential for healthy growth and abundant flowering. Organic Fertilizer for Rose Plants such as vermicompost, bone meal, neem cake, and mustard cake provide balanced nutrition and improve soil health.

    With proper fertilization, sunlight, watering, and pruning, rose plants can produce stunning flowers throughout the year.

    Whether you grow roses in garden beds or pots, following the right fertilizer schedule will help your plants thrive and bloom beautifully.


    FAQs

    What is the best fertilizer for rose plants?

    Organic fertilizers like vermicompost, bone meal, and neem cake are excellent for roses.

    How often should I fertilize rose plants?

    Fertilize every 15–20 days during the growing season.

    Can I use kitchen waste as fertilizer for roses?

    Yes, banana peel fertilizer and compost tea work well for rose plants.

    Why are my roses not flowering?

    Lack of sunlight, poor soil nutrition, or improper pruning may reduce flowering.

    Buy Rose Plants: https://vaanmitra.in/rose-plants

    Know more about Rose Plants: https://en.wikipedia.org/wiki/Rose

  • Rose Plant: The Ultimate Guide to Growing Beautiful Roses in India🌹

    Introduction

    The Rose Plant is one of the most iconic flowering plants in the world. Known as the Queen of Flowers, roses symbolize love, beauty, and elegance. For centuries, roses have been admired not only for their breathtaking blooms but also for their fragrance and cultural significance.

    In India, the rose plant is a favorite choice for gardeners because it thrives in many climates and can be grown in gardens, terraces, balconies, and decorative pots. From traditional red roses used in ceremonies to modern hybrid varieties grown for landscaping, roses remain one of the most widely cultivated ornamental plants.

    With proper care and the right growing conditions, a rose plant can bloom multiple times throughout the year, creating a vibrant and colorful garden environment.

    This ultimate guide will help you understand everything about growing a rose plant successfully in India, including soil preparation, watering techniques, pruning methods, fertilization, and pest control.


    History and Cultural Importance of Roses

    Roses have been cultivated for over 5000 years, making them one of the oldest ornamental plants known to humans.

    Throughout history, roses have symbolized:

    • love
    • beauty
    • purity
    • passion
    • celebration

    In India, roses hold great cultural significance. They are widely used in religious ceremonies, weddings, festivals, and decorative garlands.

    Rose petals are also used to produce:

    • rose water
    • perfumes and attars
    • herbal medicines
    • sweets such as gulkand

    Because of these uses, the rose plant has remained an important part of Indian gardening traditions.


    Types of Rose Plants

    There are thousands of rose varieties available worldwide. Choosing the right type of the plant depends on your garden space and aesthetic preference.

    Hybrid Tea Roses

    Hybrid tea roses are among the most popular varieties.

    They produce large elegant flowers on long stems, making them perfect for bouquets and floral arrangements.

    Characteristics:

    • large single blooms
    • strong fragrance
    • long stems
    • ideal for cut flowers


    Floribunda Roses

    Floribunda roses produce clusters of flowers rather than single blooms.

    Advantages:

    • continuous flowering
    • colorful garden display
    • compact growth
    • excellent for landscaping


    Climbing Roses

    Climbing roses grow vertically and can decorate:

    • garden walls
    • pergolas
    • trellises
    • fences

    Benefits:

    • vertical gardening
    • dramatic garden aesthetics
    • abundant flowering


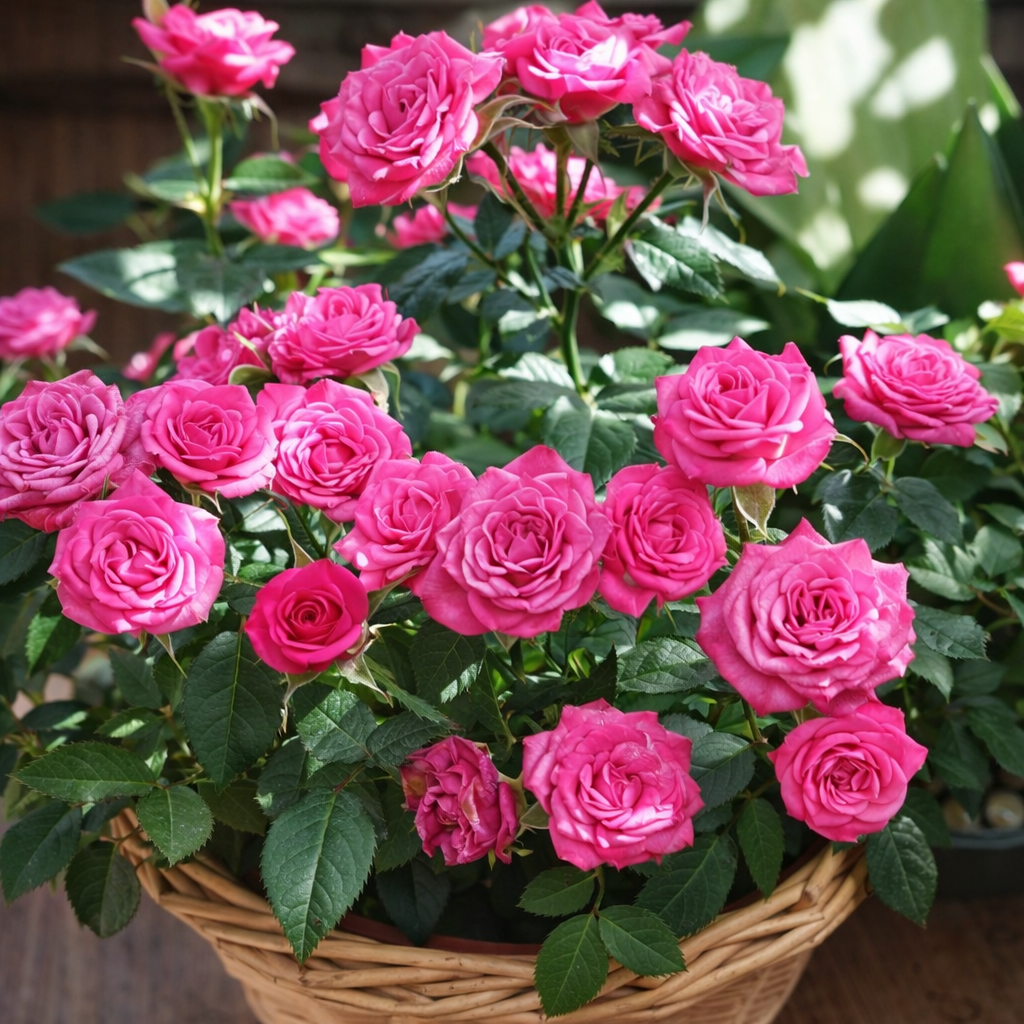
    Miniature Roses

    Miniature roses are compact plants suitable for container gardening.

    Features:

    • small plant size
    • perfect for balconies
    • easy maintenance
    • frequent blooming


    Best Climate for Growing Rose Plants in India

    The plant grows best in moderate climates.

    Ideal Temperature

    The optimal temperature for roses is:

    18°C to 28°C

    Roses may struggle in extremely hot or freezing conditions.


    Sunlight Requirements

    Sunlight is essential for the plant growth.

    Roses require:

    6 to 7 hours of direct sunlight daily

    Adequate sunlight ensures:

    • healthy growth
    • stronger stems
    • vibrant flowers
    • improved disease resistance


    Best Soil for Rose Plants

    Soil quality significantly affects the plant health.

    Ideal Soil Conditions

    The soil should be:

    • well-draining
    • rich in organic matter
    • slightly acidic (pH 6–7)


    Perfect Soil Mix for Rose Plants

    A recommended soil mixture includes:

    40% garden soil
    30% compost or vermicompost
    20% cocopeat
    10% river sand

    This combination provides proper aeration and moisture retention.


    How to Plant a Rose Plant

    Proper planting is essential for healthy growth.

    Step 1: Choose the Right Pot

    Select a pot that is 12–16 inches deep.


    Step 2: Prepare the Soil

    Fill the container with nutrient-rich soil mix.


    Step 3: Plant the Rose

    Place the plant gently and cover the roots with soil.


    Step 4: Water the Plant

    Water thoroughly after planting.


    Watering Requirements

    Proper watering ensures strong root development.

    Watering Frequency

    Summer: every 1–2 days
    Winter: every 3–4 days
    Monsoon: when soil dries


    Watering Tips

    • water deeply
    • avoid waterlogging
    • ensure drainage


    Fertilizer for Rose Plants

    Roses are heavy feeders and require regular nutrients.

    Best Organic Fertilizers

    • vermicompost
    • cow dung manure
    • bone meal
    • neem cake
    • mustard cake fertilizer


    Fertilizing Schedule

    Apply fertilizer every 15–20 days during active growth.


    Pruning Rose Plants

    Pruning helps maintain plant health and encourages new growth.

    Benefits

    • increases flowering
    • removes dead branches
    • improves airflow
    • stimulates new shoots


    Best Time to Prune

    In India, pruning is best done in October–November.


    Common Rose Plant Pests

    Aphids

    Small insects that suck plant sap.

    Solution: neem oil spray.


    Spider Mites

    Cause yellow leaves.

    Solution: regular misting and neem oil.


    Thrips

    Damage rose buds.

    Solution: organic insecticidal soap.


    Common Rose Diseases

    Powdery Mildew

    White powder on leaves.

    Black Spot

    Black spots causing leaf drop.

    Rust Disease

    Orange patches on leaves.

    Prevent these diseases with proper airflow and organic fungicides.


    Growing Roses in Pots

    Container gardening is perfect for urban homes.

    Tips:

    • use large pots
    • provide sunlight
    • fertilize regularly
    • ensure drainage


    Seasonal Care for Rose Plants

    Summer Care

    • increase watering
    • mulch soil
    • protect from extreme heat


    Monsoon Care

    • improve drainage
    • avoid waterlogging


    Winter Care

    Winter is the best blooming season for roses.

    Provide sunlight and balanced fertilizer.


    How to Make Rose Plants Bloom More

    Follow these expert tips:

    • prune regularly
    • fertilize consistently
    • remove faded flowers
    • provide full sunlight


    Benefits of Growing Rose Plants

    The plant offers many advantages:

    • beautiful flowers
    • pleasant fragrance
    • garden decoration
    • attracts pollinators
    • cultural significance


    Best Rose Varieties for Indian Gardens

    Popular varieties include:

    • desi roses
    • damask roses
    • hybrid tea roses
    • floribunda roses
    • miniature roses


    Conclusion

    The rose plant remains one of the most cherished flowering plants in the world. With the right care, sunlight, soil, and watering routine, roses can thrive in Indian climates and produce spectacular blooms throughout the year.

    Whether grown in gardens, terraces, or containers, a rose plant adds elegance, fragrance, and timeless beauty to any space.

    By following the tips in this guide, you can successfully grow healthy roses and enjoy stunning flowers season after season.


    FAQs

    How often should I water a rose plant?

    Water every 1–2 days in summer and every 3–4 days in winter.

    Can rose plants grow in pots?

    Yes, rose plants grow very well in containers with proper soil and sunlight.

    What is the best fertilizer for rose plants?

    Organic fertilizers such as vermicompost, bone meal, and neem cake work best.

    When should roses be pruned in India?

    Roses should be pruned in October–November.

    Buy Rose Plants: https://vaanmitra.in/rose-plant

    Know More About Rose Plants: https://en.wikipedia.org/wiki/Rose

0
0
Your Cart
Your cart is empty